 Quail Corner
What Wattage Heat Lamp for Quail Brooder: Pick by Setup
There is no universal 100W, 150W, or 250W answer to what wattage heat lamp quail brooder setups need. The right result is a 95°F / 35°C warm zone at chick level, a cooler escape zone, secure equipment, and a thermometer reading that matches the birds' space.
Set the brooder to 95°F / 35°C at chick level in week one. Reduce the target by about 5°F per week, and warm-weather chicks can leave supplemental heat at 3–4 weeks when fully feathered. This guide helps you choose the heat source, fixture, and budget before you shop. For the broader comparison, see best heat lamp for quail brooder (2026): 8 picks, which covers bulbs, fixtures, wattages, and heat-plate alternatives.
Types compared
The main choices are a ceramic heat emitter, a visible red infrared bulb, a heat plate, or a complete fixture and bulb system. The first two are bulbs. They need a compatible holder and independent support before they go over chicks.
| Heat source | Visible light | Wattage examples | Main advantage | Who should choose it |
|---|---|---|---|---|
| Ceramic emitter | None | 100W, 150W | Heat without a glowing bulb | Keepers wanting a dark rest period and a separate fixture |
| Red infrared bulb | Soft red light | 250W listing examples | Visible red light and radiant heat | Keepers who specifically want a red bulb and can manage its output |
| Heat plate | None | Varies by model | A dark rest area under a complete heat source | Keepers who prefer a plate system over suspended radiant heat |
| Fixture and bulb system | Depends on bulb | Depends on bulb | The holder is part of the buying decision | First-time keepers who need compatible mounting equipment |
Ceramic heat emitters
A ceramic emitter produces heat without visible light. That helps if your brooder sits in a living space or you want the chicks to have a clear light and dark routine. The LUCKY HERP 100W ceramic emitter is a 120V, standard E26 bulb with ceramic construction and two bulbs in the pack. It still needs a ceramic-socket holder and independent support.
Red infrared bulbs
Choose a red bulb if you specifically want visible red light along with radiant heat. The printed wattage still does not tell you the temperature inside your brooder. A 250W listing is a large product specification for many small indoor boxes, so measure before settling on it.
Heat plates
A heat plate gives chicks a dark place to warm themselves without hanging a bulb above the bedding. Choose this route if you want a complete brooding system instead of matching an emitter to a separate holder. For broader heat-plate and brooder-system choices, see Best Quail Brooder (2026): 7 Heat Plates & Kits.
Complete fixture systems
A fixture is the lamp holder, reflector, switch, and mounting hardware. It is not interchangeable with a bulb. If you buy an emitter alone, read the holder specification, match the bulb base, and give the fixture its own stable support.
Key factors to consider
The thermometer wins the argument. Match the source to the enclosure and room, then adjust the setup and recheck at chick level. Best brooder thermometer for quail (2026): 7 picks covers probes, displays, and other ways to monitor the warm zone without guessing.
Brooder size and room temperature
A small box loses heat differently from a broad brooder with a tall lid. A cold garage, a warm utility room, and a drafty location will also produce different readings from the same bulb. Think of wattage as available output. It is not a prescription for every enclosure.
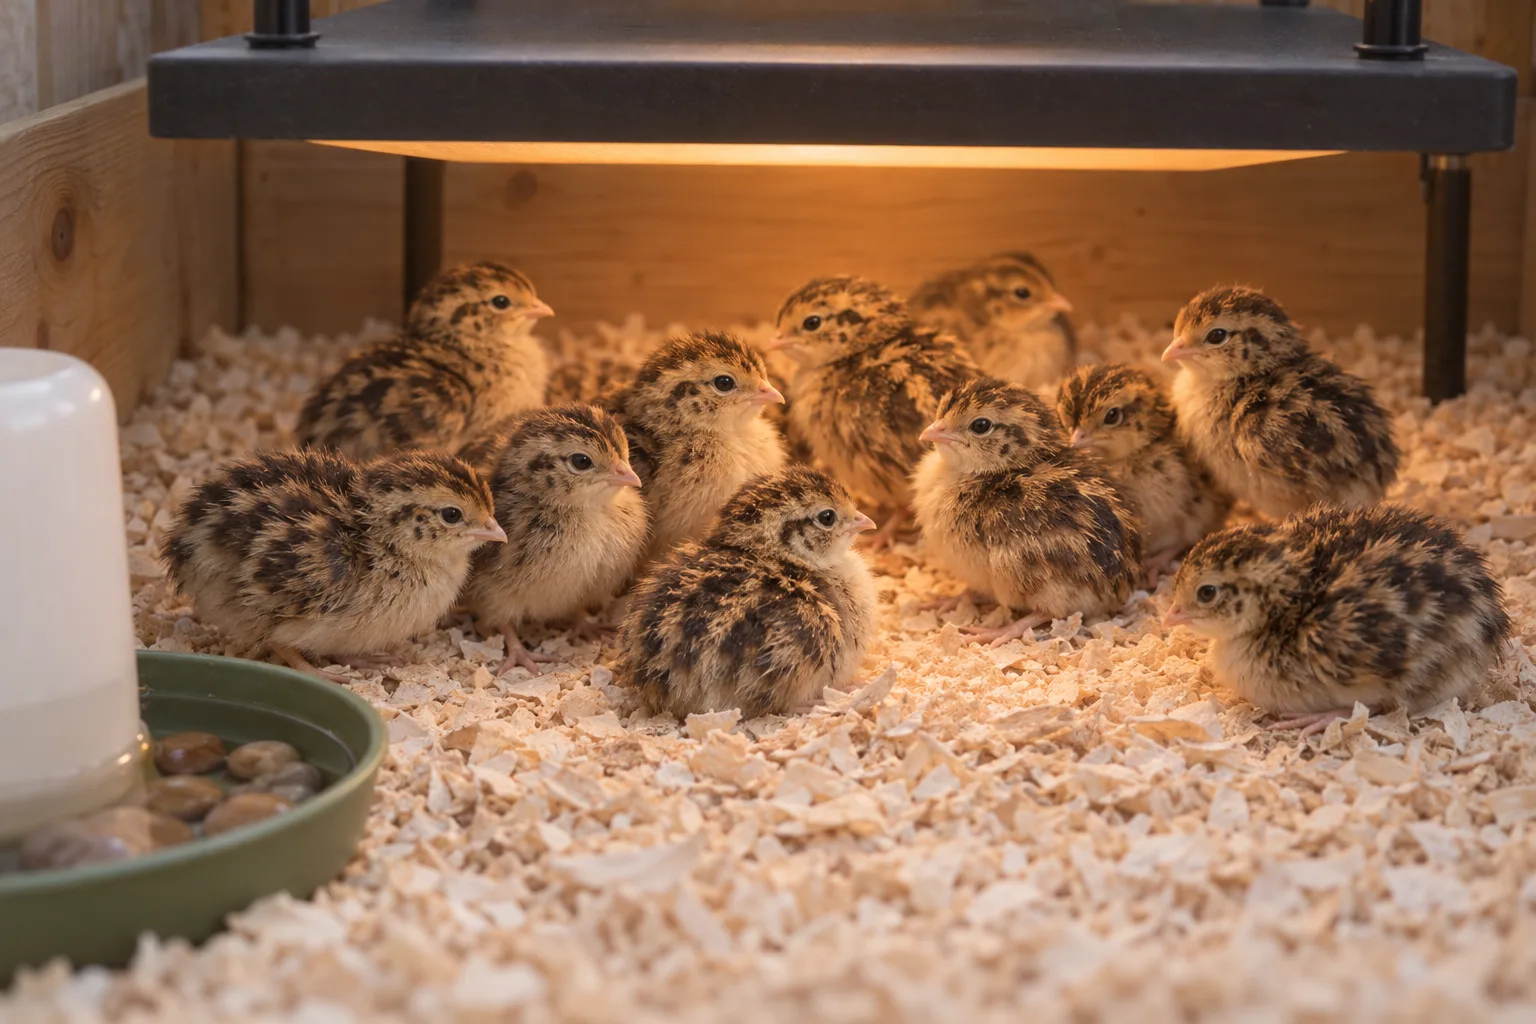
Place the heat source over one side, leaving the chicks a clear route away from it. Watch where they settle after you adjust the lamp. Huddling tightly under the source points toward too little warmth, while chicks staying at the far edge points toward too much heat or too small a cooler zone.
Ventilation and the heat gradient
Ventilation carries away stale air and excess heat, but a direct draft can chill chicks. You want air exchange without turning the entire brooder into one cold tunnel. A warm side and a cooler side let chicks choose their comfort instead of forcing every bird into one temperature.
Measure where the chicks stand, not beside the bulb and not high on the wall. Reposition the fixture, change the enclosure, or use another bulb when the reading is wrong. Then wait for the setup to settle and check again at chick level.
Fixture rating and independent support
Plastic or unrated sockets are a poor match for a hot emitter. Look for a compatible ceramic socket, inspect the cord and switch, and follow the fixture's own instructions. A clamp that can slip is not a mounting plan. Use independent support so the heat source cannot fall if a clamp loosens.
Meyer Hatchery warns about heat lamps near cardboard and other combustible material. Stromberg's guidance also stresses secure mounting and matching the setup to brooder dimensions. Myshire Farm, a vendor source, describes the lamp trade-off and points readers toward lower-fire-risk alternatives. Those sources agree on the practical rule: manage the whole system, not the bulb label.
Thermometer placement and chick behavior
Set the sensor at the height of the chicks in the warm zone. Check it after the lamp has run in its normal position, then compare the reading with the flock's behavior. Use a second check if the first sensor is sitting against a wall, directly under the emitter, or outside the brooder.
Keep the rest of the brooder setup safe too. A chick-safe waterer matters because spills cool bedding and change the local conditions. Best Quail Chick Waterer (2026): 7 Safe Picks covers shallow, no-drown options for this same brooder stage.
Budget tiers
Budget tells you what is included, not how safely the setup will run. A bulb-only purchase covers replacement heat and might include a spare. A ceramic-socket fixture or system costs more because it solves the holder and mounting side too. Price bands change, so check the current price at checkout.
| Price band | What you get | Best fit | Watch for |
|---|---|---|---|
| $ | Bulb-only replacement, often a multi-pack | A keeper who already owns a compatible ceramic-socket fixture | The holder, support, and safe placement remain your job |
| $$ | A single higher-output bulb or a more specialized emitter | A setup that needs a different output after measurement | Higher wattage can overheat a small box |
| $$$ | A premium pair, fixture, or broader heating system | Buyers prioritizing a complete system or a particular design | More money does not replace temperature checks or secure support |
The LUCKY HERP 100W ceramic emitter sits in the $ price band. It has no visible light, a standard E26 base, a 120V specification, and two bulbs in the pack. That spare helps with replacement coverage. It is still only the bulb, so budget for a compatible ceramic-socket holder if you do not already have one.
Common mistakes to avoid
- Using a plastic or unrated socket. A bulb can fit physically while the holder is wrong for the heat. Use a compatible ceramic-socket fixture and follow its instructions.
- Trusting a clamp by itself. Clamps slip and cords pull. Add independent support, keep the heat source stable, and check the mount before chicks arrive.
- Leaving cardboard or loose combustible material nearby. Meyer Hatchery specifically warns about heat lamps and combustible materials. Keep the heat path clear and use a brooder arrangement that cannot sag into the hot area.
- Heating the whole brooder. Chicks need a warm zone and a cooler escape zone. If every corner is hot, they cannot move away when they need to.
- Buying by wattage without measuring. The number printed on the bulb is a specification. Measure at chick level, read the flock, adjust the setup, then recheck.
Our picks
Start with the complete setup, then choose the bulb. The broader best heat lamp for quail brooder (2026): 8 picks comparison covers bulbs, fixtures, wattages, and safer alternatives. It is the right next stop if you want product-by-product choices rather than a wattage rule.
For a no-light bulb and spare coverage, the LUCKY HERP 100W two-pack is the straightforward choice here. Remember the caveat: it is a bulb, not a lamp fixture. If you need the holder and mounting hardware in the same purchase, use the roundup to compare complete systems and heat-plate alternatives.
Frequently asked questions
what size heat lamp for quail chicks?
There is no single size for every brooder. Start with a heat source that warms one zone to 95°F / 35°C at chick level, while leaving a cooler escape zone. Brooder dimensions, room temperature, ventilation, and fixture position decide which wattage works.
150 vs 250 watt heat lamp for quail
Treat 150W and 250W as product specifications, not automatic brooder settings. A 250W bulb can overwhelm a small indoor box, while a larger or colder setup needs a different result. Adjust height or the heat source, then recheck the chick-level reading.
how many watts for a quail brooder?
No universal wattage answers this safely. Coturnix chicks need 95°F / 35°C at chick level in week one, so choose a compatible heat system and measure that zone. Leave a cooler area, secure the equipment, and keep enough ventilation to prevent a trapped hot spot.
what wattage heat lamp for quail brooder?
Choose by the complete setup rather than the number printed on the bulb. A 100W emitter suits some small indoor setups, while another enclosure or room needs a different result. Set up a warm zone, measure at chick level, adjust the setup, then recheck.
Are ceramic emitters suitable for quail chicks?
Yes. A ceramic emitter gives heat without visible light, which suits keepers who want a dark rest period. It is still a very hot bulb, so use a compatible ceramic-socket holder, independent support, and nonflammable surroundings. The emitter is a bulb, not a complete lamp.
How can you tell when a brooder is too hot?
Spread-out chicks avoiding the heated area, open-mouth breathing, or persistent movement away from the warm zone are warning signs. Check the thermometer at chick level, lower the heat safely or increase the cooler area, and recheck. Do not rely on the bulb label or a reading at the lid.