 Quail Corner
Best Overall
IncuTherm™ Plus Digital Thermometer and Hygrometer for Egg Incubator
$$
Check Price on AmazonPut the thermometer's sensing point at chick level in the warm zone, where quail can actually stand or rest. A remote probe is especially handy because it stays inside while the display remains outside the brooder.
A four-step chick-level setup
A readable chick-level temperature check without unsafe cables or misleading surface readings.
Place the sensor at chick level in the warm area, then leave a cooler area available for moving away from heat. For Coturnix, use 95 °F / 35 °C at chick level during week 1, then drop about 5 °F per week. Button quail also start at 95 °F in week 1 and follow the 5 °F-per-week drop.
Read the display in your chosen unit, check that the probe has not shifted, and use chick behavior alongside the number. In warm weather, Coturnix chicks are generally off heat by 3–4 weeks. The gradient still matters throughout the setup.
Gather the thermometer, its manual, the required or included battery, and a safe way to keep the monitor stable. Have the running brooder ready with its heat source, bedding, feed, and water already in place. That makes it possible to choose a sensor location that reflects where chicks will actually rest.
If you want the screen outside the enclosure, see our brooder thermometer picks for remote-probe options. The IncuTherm™ Plus has a remote probe, an LCD display, temperature and humidity readings, min/max memory, Celsius and Fahrenheit, and an included battery. Its probe can sit inside while the display stays outside.
For the rest of the brooder hardware, see our quail brooder picks. If the enclosure feels cramped or leaves no clear warm-to-cool choice, use this quail brooder sizing guide before final placement.
Check the IncuTherm Plus on Amazon $$
Check Price on AmazonStart by checking the unit, placing its sensing point at chick level, securing the cable or monitor, and watching the warm-to-cool setup.
Read the manual and install the required or included battery. Confirm whether the display shows Celsius or Fahrenheit, then check that the screen responds. If the unit has a probe, identify the probe end and the display end before routing anything through the enclosure.
A temperature reading only helps when you know what it represents. Fixed and remote units measure ambient conditions around their sensing point. An infrared thermometer measures the surface to which it is aimed.
Place the sensor in the warm area where chicks can stand or rest. Keep it out of direct contact with the heat source, out from under bedding, and away from a location that measures only the surrounding room. A readable display in the wrong place still gives you the wrong picture.
The brooder needs a warm zone and a cooler area. Mississippi State University Extension Service explains the value of controlling brooding temperature as chicks grow, while Penn State Extension uses chick-level monitoring as part of poultry brooding practice. The number describes one spot, not every part of the enclosure.
For a fixed monitor, secure the unit where the sensing point sits at chick level and the display remains easy to read. Keep it dry, stable, away from water and wet bedding, and out of the pecking path.
For a remote unit, place only the probe in the warm-zone chick area and keep the LCD display outside. Route the cable so chicks cannot pull or peck it. Follow the product manual for the approved mounting and cable path. Do not bury the probe to force a preferred number.
Confirm the display unit, make sure the probe has not moved, and check that chicks can reach a cooler area. For Coturnix, the week-one support point is 95 °F / 35 °C at chick level. Later, drop about 5 °F per week. Button quail do the same in week 1 and follow the same 5 °F-per-week drop.
Adjust the heat source or the setup when the reading and the enclosure do not make sense. Do not move the sensor simply because the number looks convenient. Temperature is essential. Humidity is optional here; it matters more during incubation.
An infrared thermometer can check a heat plate or another warm surface without contact. Aim consistently and remember that each reading shows the surface in front of the tool. It does not measure air throughout the brooder, so keep a fixed or probe monitor for ongoing information.
Start with the battery, probe position, and sensor placement. Then review the heat source and the warm-to-cool gradient before changing the setup.
Check the battery, connections, and manual first. Confirm the display unit and look for a shifted probe. Keep the monitor dry and stable before deciding the brooder temperature itself changed.
Pause the setup and create a safer cable route using a method allowed by the product manual. Return the sensing point to chick level, away from bedding and water. A protected probe in the wrong place is still less useful than a safe probe in the warm zone.
Review the heat source, warm-to-cool gradient, drafts, and sensor location together. Check what chicks can choose, rather than relying on a single display. If you are concerned about chick health, contact a veterinarian or an extension office instead of trying to diagnose from a thermometer.
That difference can be normal, because an infrared tool reads surfaces and a fixed or probe unit reads the area around its sensor. Compare like with like, place the ongoing monitor at chick level, and follow each device's manual for its intended use.
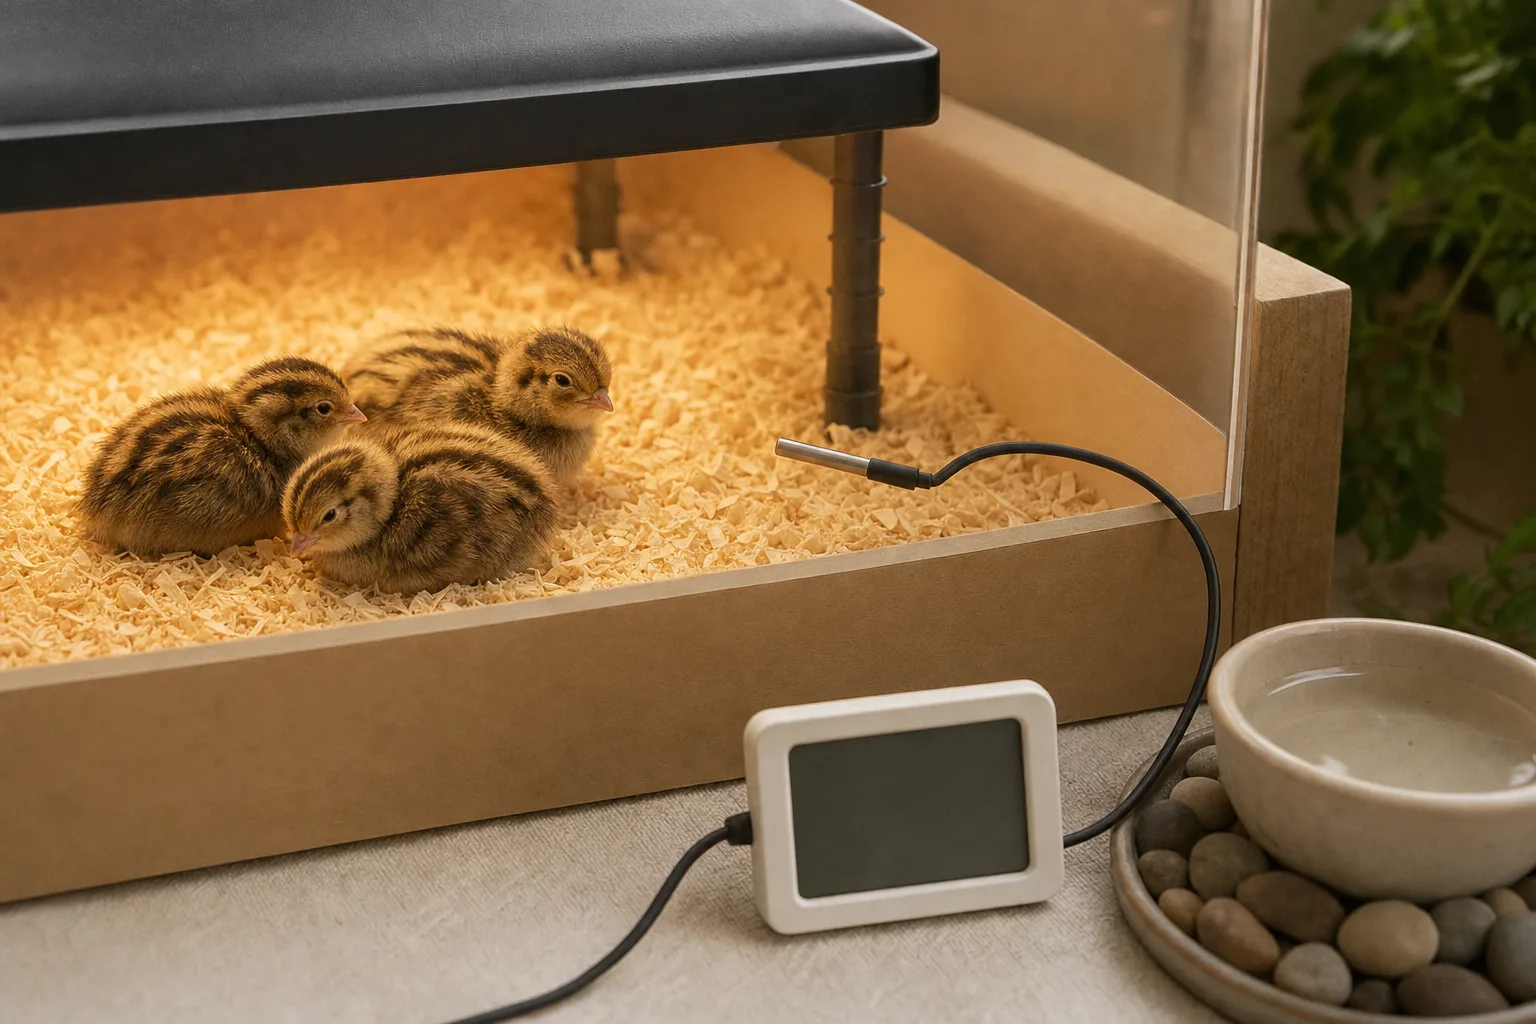
Put the sensing point at chick level in the warm area where the birds can stand or rest. Keep it away from the heat source itself, bedding, water, and room-height air. Leave a cooler area open so chicks can move away from heat when they need to.
Temperature is the essential brooder measurement in a thermometer. A hygrometer is optional for trend awareness and is more central to incubation. If a combined unit is convenient, place it for an accurate chick-level temperature reading first and treat its humidity number as extra information.
Yes, an infrared thermometer can check a warm plate or another surface without contact. It reads the surface you aim at, so it does not continuously measure brooder air. Use a fixed or probe unit for ongoing ambient-area information.
Read the manual, place the sensing point at chick level in the warm zone, and secure the monitor or probe so it stays dry and stable. For a remote unit, leave the probe inside and the display outside, then route the cable where chicks cannot pull or peck it.