 Quail Corner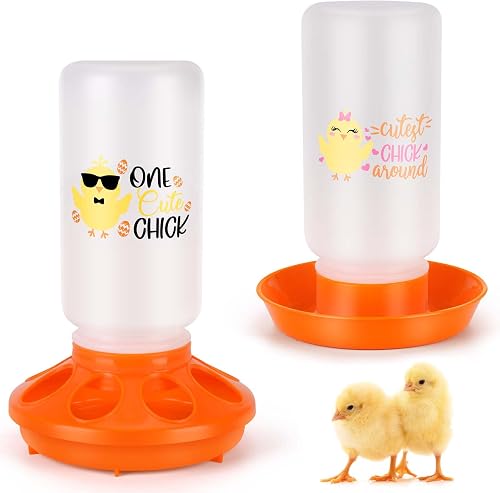
Best Overall
TGEYD Chick Feeder and Waterer Set – Automatic 1L Chicken Feeder and Waterer for Baby Chicks, Ducks, and Quail – Brooder Starter Kit & Chicken Coop Accessories
$
Check Price on AmazonThe safest setup is a stable feeder that the smallest chick can reach without climbing into it, placed near the brooder heat source rather than directly underneath it. This guide covers placement, introduction, stability, cleaning, and observation, with our quail chick feeder picks for the equipment decision.
A repeatable brooder setup routine
Every chick can reach dry starter feed from a stable feeder without climbing into it.
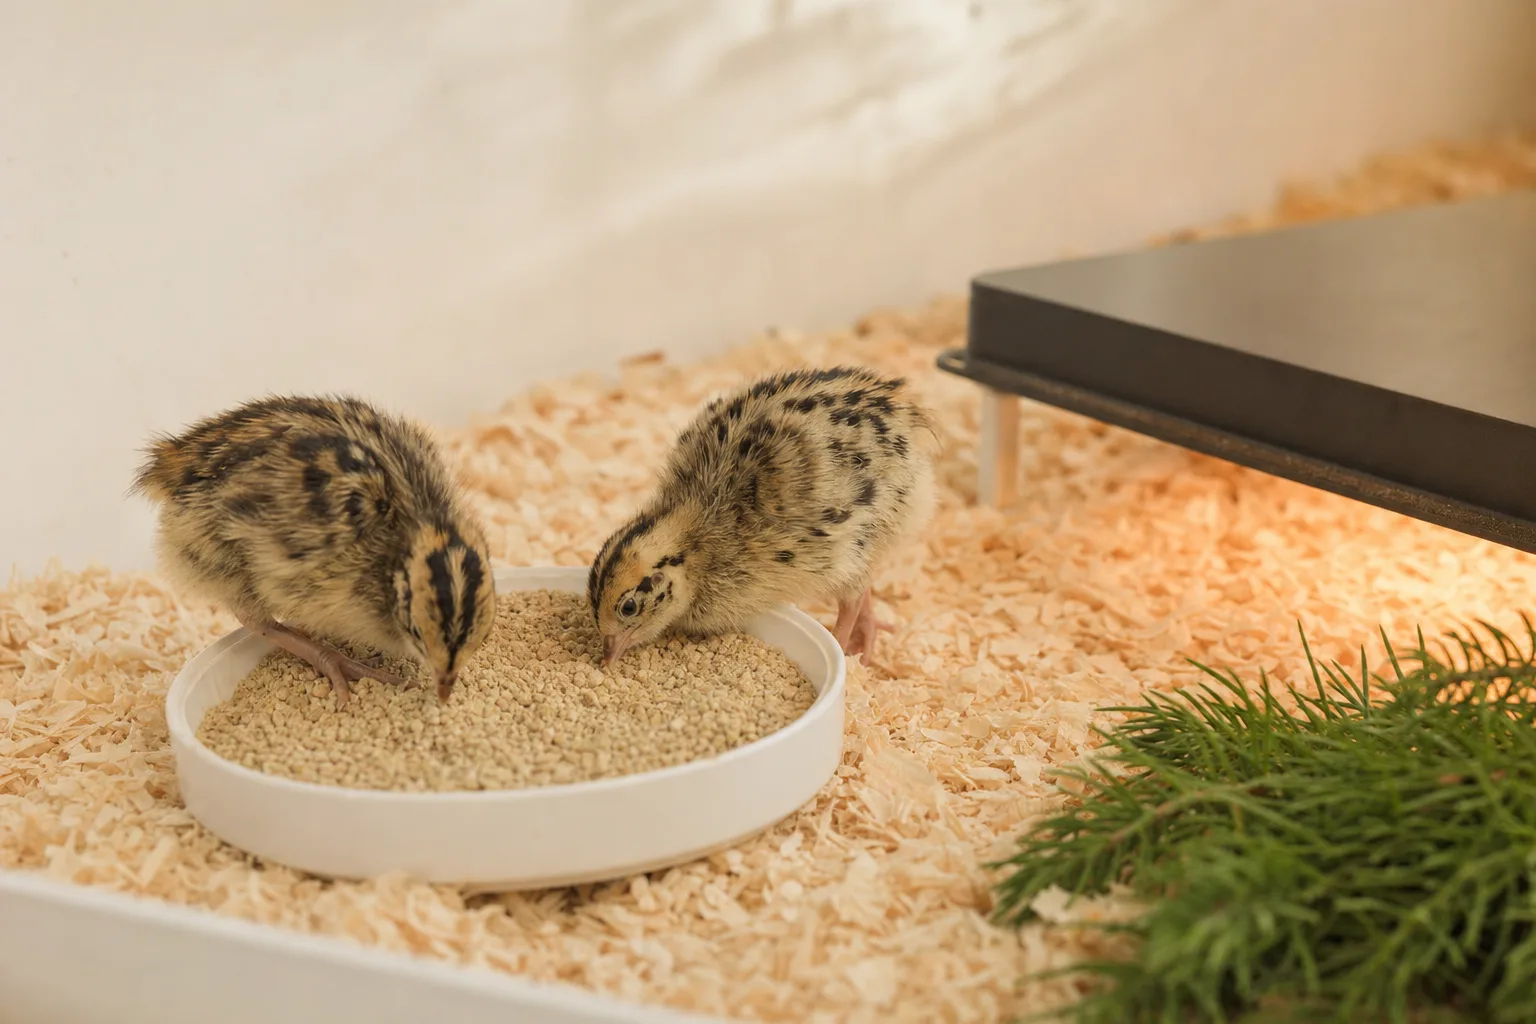
Choose a chick-sized feeder, fill it with dry Coturnix starter, and set it on a level area near the heat zone. Guide the chicks to the opening, then watch the whole group. You should see the feed clearly, the unit should stay upright, and every chick should reach it without climbing inside.
Penn State Extension’s “Brooding of Domestic Fowl” recommends keeping feeders near the heat source rather than directly under it and introducing chicks to feed in a low dish or chick feeder.
Gather the feeder, correct starter, stable bedding, and a clean water setup before the chicks arrive. For the wider equipment picture, find our quail feed and water guides here.
$
Check Price on AmazonInspect the actual unit, add the right feed, choose the heat-zone position, and observe the smallest chick. Make one adjustment at a time so you can tell what fixed the problem.
Check every base, lid, opening, and fastener. Look for sharp edges, cracks, loose sections, or an opening that lets a chick enter the feed area. A simple trough or dish can work when it is shallow and stable. A ported or covered design can reduce access to the feed surface, though its openings still need checking.
For the TGEYD set, the listed snap-apart bases are handy when you want to separate feed from water in a starter brooder. Follow the product’s care instructions rather than guessing about washing methods.
Add a small, visible amount of complete starter crumble. Coturnix chicks need 28–30% game-bird starter for weeks 0–6. Keep the feed dry and easy to see. Do not bury it in a deep container or bedding.
Mississippi State Extension’s “Grow Healthy Chicks” tells keepers to help chicks locate feed and water. Walk the birds toward the opening and watch for normal access instead of assuming they found it.
Place the feeder near the brooder heat source, never directly underneath it. Penn State Extension’s “Brooding of Domestic Fowl” and “The Brooder Box” tell keepers to keep food and water available while leaving chicks room to move away from heat. Set the unit on a level surface and keep it out of wet bedding.
When planning the rest of the brooder, use our quail brooder guide. The feeder should fit inside the active area without blocking the cooler space.
Turn the lowest practical opening toward the busy part of the brooder. Check the smallest chick first. It should reach the feed without climbing, squeezing behind another bird, or entering the feeder. A hanging unit is fine only when its mount is stable and all chicks can reach it safely.
Guide each chick toward the opening and watch the group use it. Silver Homestead’s “No Waste Quail Feeders that Work” describes a keeper’s approach to limiting entry and mess, not controlled evidence.
Watch for blocked, pushed-away, trapped, or hesitant chicks. If one bird cannot reach the feed, move the feeder, remove an obstruction, or change the format. Product wording such as “no mess” cannot replace watching what happens in your brooder.
Keep feed and water accessible, with neither station directly under the heat source. An all-in-one kit simplifies a first setup, while a keeper who already has a suitable waterer may prefer feeder-only equipment. Check that the pieces fit the brooder and can be separated when needed.
For the separate waterer choice, see our quail chick waterer picks. The Penn State “The Brooder Box” guidance supports a chick-safe water arrangement, but a product listing cannot guarantee safe outcomes.
Confirm that the unit has not tilted and that the openings remain clear. Check that feed is dry and clean and that every chick can return to it. Clean it when you find wet or soiled feed, then follow the manufacturer’s instructions for washing and drying.
Most setup problems show up as poor access, tipping, spilled crumble, or dirty feed. Check the station from chick height and correct the visible problem.
Start with the symptom you can see. Adjust access, stability, or feed condition before changing several parts at once. If a chick appears unwell or the concern goes beyond feeder setup, contact a vet or extension office.
Move it into a clearly visible position, then guide the chicks to the opening. Keep the station accessible and watch the smallest bird reach it without climbing.
Choose a design that limits entry, stabilize it, and observe again. Silver Homestead describes changing formats when birds enter the feed area, though that is lived experience rather than controlled testing.
Move it to a level surface and secure it according to the manufacturer’s design. If it still tips when birds push against it, switch to a more stable format.
Remove the affected feed and inspect the location and water arrangement. Clean and dry the unit according to its care instructions, then refill with dry starter.
Reposition the feeder, clear obstructions, and watch the group again. If the chick remains unable to eat or appears unwell, contact a vet or extension office.
Keep the feeder and waterer easy to see and check. Give chicks room to move between heat and cooler space, then judge the station by what the birds do rather than by its label.
The TGEYD set is a sensible all-in-one starter choice for baby quail because it lists a feeder and waterer together. If you already own a suitable waterer, choose a feeder-only format instead and avoid buying a duplicate station.
A port feeder can limit scratching, while a trough often gives simpler access and easier visual checks. The right choice depends on whether the smallest chick can reach it and whether the design stays stable and clean in your brooder.
Day-old quail chicks can use a hanging feeder only when every chick can reach it safely and the mount stays stable. Watch the group closely after placement, and lower or change the unit if access requires climbing or squeezing.
Use a design that limits entry, place it on a stable surface, and change formats if chicks can climb inside. Silver Homestead’s keeper observations also point toward limiting entry and watching the birds, though those reports are practical experience rather than controlled testing.
Coturnix chicks need 28–30% game-bird starter for weeks 0–6. Quail Facts provides that life-stage target, while Mississippi State Extension supports helping chicks locate accessible feed and water. Keep the crumble dry and visible in the feeder.
Inspect the feeder for wet or soiled feed, remove affected crumble, and follow the product’s care instructions for washing and drying. A visible reservoir helps you check the feed, but you still need to watch every chick reach the station.