 Quail Corner
Best Heat Plate for a DIY Box
RentACoop 12x12" Adjustable Heating Plate with Foldable Anti-Roost Cone
$$
Check Price on AmazonFor a first hatch, use a clear storage tub with a radiant heat plate at one end. It goes together quickly, costs little, and keeps an open bulb away from the bedding. Plan on about $20 for the tub and wire, then add a roughly $24–60 heat plate. For a closer look at the heat options, see our quail brooder picks. The setup works for coturnix and button quail when the floor, waterer, and heat are set up for their size.
A simple build for a first coturnix or button quail hatch
A dry tub brooder with a warm side, a cooler side, and chick-safe food and water, ready before the hatch.
Use a clear storage tub, cut high wire vents, line the floor with paper towels, and put a radiant plate at one end. The tub and wire run about $20, while a suitable plate adds roughly $24–60. Hold 95°F at chick level in week one, reduce the target by about 5°F each week, and switch off heat at 3–4 weeks when the birds are fully feathered.
Gather the tub, vent wire, paper towels, heat source, thermometer, low feeder, and chick-safe waterer before the eggs hatch. The floor needs to give each week-one chick about 0.5 sq ft, with enough room for a warm side and a cooler side.
For a standard batch, the RentACoop 12×12 radiant plate runs 22 W and has 25 height settings from 1–9 in, with center heat near 107°F radiant. Raise it as the chicks feather. The 10×10 version draws 15 W for a small hatch or button quail, while the Sindarhor plate gives a budget build three temperature settings and wipe-clean ABS panels.
$$
Check Price on Amazon
$$
Check Price on Amazon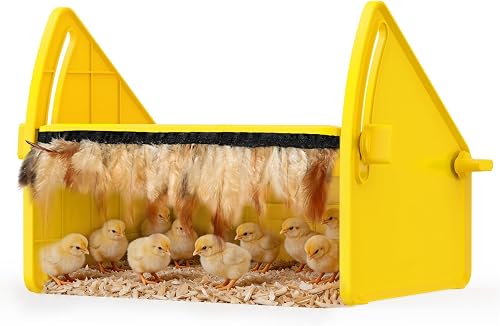
$
Check Price on AmazonStart with the heat source and build the tub around a warm zone and a cooler zone. Then make the floor grippy, keep the water shallow, and check the warmth where the chicks' backs will be, not against the plate itself.
Choose a clear plastic tub sized to your hatch. Clear walls let you spot a chick without lifting the lid, and placing the plate at one end leaves the far end cooler so chicks can choose their distance from the heat.
The RentACoop 10×10 plate at 15 W suits a small hatch or button quail. For a standard batch, the 12×12 plate gives you more heated area and 25 height settings. A budget three-setting plate is a fair way to keep the first build cheap. A radiant plate has no exposed bulb to scorch plastic or bedding, so it is the heat source I would choose for a tub.
Cut 1/4-in wire windows high on the tub sides, close to the lid. High vents let stale air and moisture out while helping keep a draft off the floor. Cover every cut edge with tape or trim so a foot or wing cannot catch.
Button chicks need a solid floor or 1/4-in wire because they are tiny. Keep their vents high, and check the floor by hand for sharp points before they go in.
Line the floor with crinkled paper towels. The wrinkles give chicks traction while they learn to stand, and fresh sheets keep droppings from turning the floor slick. Set the plate low enough for chicks to tuck under it, then check warmth at chick level with a thermometer.
Aim for 95°F at chick level during week one. The plate's center heat can read higher than the air around the chicks, so watch the chicks as well as the thermometer. Content chicks spread out, eat, and sleep; a tight pile points to cold, while chicks avoiding the plate point to too much heat.
Keep only a thin layer of water in the dish and fill the drinking area with small, flat pebbles or marbles. Quail chicks can drown in a deep bowl, and button quail need this barrier most of all. Change the water daily and put the dish where chicks can reach it without crowding under the plate.
Offer 28–30% game-bird starter from day one through week six. Use a low feeder with a lip the chicks can reach, and keep it close to the water without putting either dish under the heat plate. Check the feed each day for dampness or bedding.
Raise the plate or otherwise reduce the target by about 5°F each week as the chicks feather. Turn the heat off at 3–4 weeks when they are fully feathered. Move them to grow-out then, with at least 1 sq ft per bird on wire; 1.5 sq ft is kinder. For that next home, use our grow-out cage guide, and the hatching hub covers the rest of the hatch-to-grow-out work.
Protect the chicks from drowning, slipping, sharp wire, and crowding. Check the heat at chick level instead of trusting a dial or your hand, because a tub can have a hot spot and a cold corner at the same time.
Read the chicks first, then check the temperature at their level and look for drafts, wet bedding, or a blocked waterer. Make one change at a time so you can see what fixed the problem.
The warm zone is too cold. Lower the plate a little, block a draft, and recheck at chick level before changing anything else. Give them space to move away from the heat once they settle.
The brooder is too warm. Raise the plate or improve ventilation without making a floor-level draft, then check the warm zone again. Panting or holding wings away from the body means they need relief from heat.
Keep the chick warm and dry, make food and water easy to reach, and check that larger chicks are not pushing it aside. If it does not perk up, talk to your vet or extension office. This guide does not cover medical care.
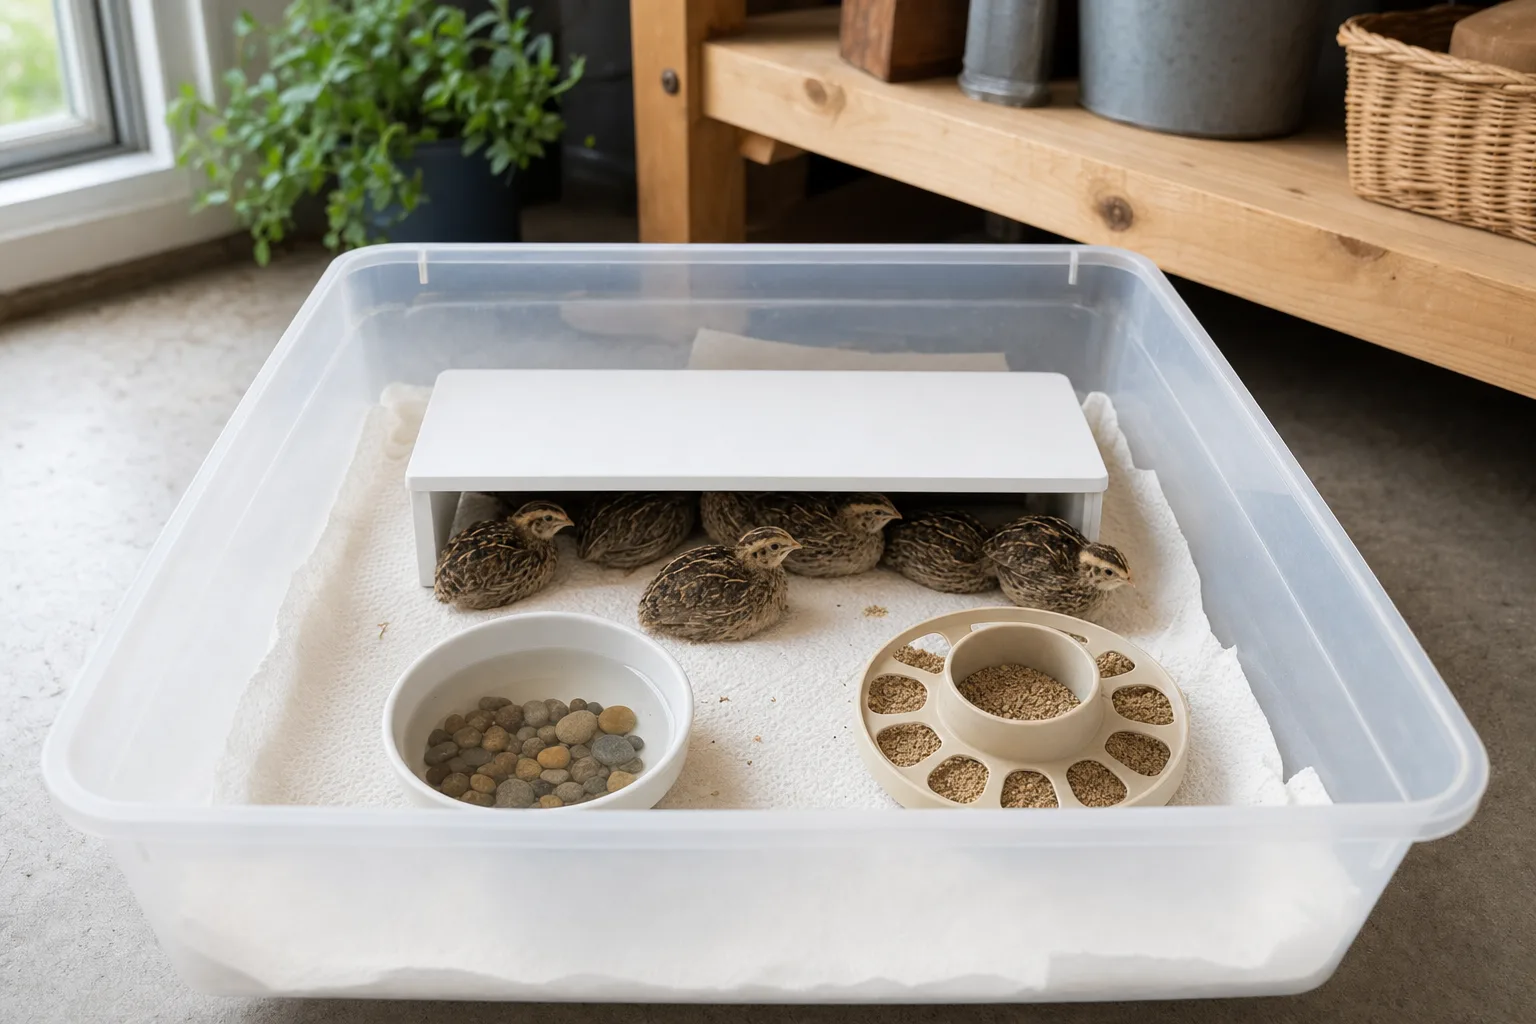
For coturnix chicks, plan roughly 0.5 sq ft per chick in week one. Leave room for the plate, feeder, waterer, and a cooler patch, then move the covey before the box feels crowded.
Use crinkled paper towels. The wrinkles give new chicks traction, and fresh sheets keep the floor dry. Skip slick newspaper and cardboard, which can let little feet slide.
A radiant heat plate is the better fit for a plastic tub because it avoids an exposed hot bulb and bright light. A lamp can work when watched closely, but keep it away from bedding and plastic.
Hold 95°F at chick level for the first week, then reduce the target by about 5°F each week. Turn the heat off at 3–4 weeks when the birds are fully feathered.
Move them to grow-out at 3–4 weeks, once they are fully feathered. Give them at least 1 sq ft per bird on wire, and 1.5 sq ft is kinder.