 Quail Corner
How to Stop Quail Escaping from Run: 7 Fixes (2026)
The quickest fix is plain: secure the roof and every door, inspect seams and ground contact, then test the empty run before the birds go back. This seven-step check finds the route instead of asking quail to behave around a bad latch.
Stop Quail Escapes from the Run
A repeatable seven-step enclosure check
- Check doors and roof
- Trace seams and floor contact
- Close openings
- Secure loose edges
- Secure the top
- Reduce upward impact risk
- Test every access point
- Prepare before opening
- Check the ground edge
- Remove lift points
- Run an empty-enclosure check
- Release birds under supervision
- Contain the flock
- Guide the loose bird back
A run that keeps quail inside during daily care and routine outdoor checks.
Quick answer
Move the flock to a covered holding container. Inspect the doors, roof edges, wire-to-frame seams, corners, and ground edge, then close the route you find. Cover the top, test every latch, and walk the empty run from inside and outside before a calm supervised release.
Ready-made housing still earns an inspection. Start with our quail coop and run picks, then check the actual bird space, roof, doors, seams, and floor contact. The Aivituvin 57-inch expandable hutch is a useful multi-door example: it lists a removable tray, three lockable front doors, two detachable side doors, an asphalt roof, and a connectable design. Its 33-inch outside height says nothing about the bird-compartment height. Check the Aivituvin listing
What you'll need
- Flashlight and gloves for checking dark corners and rough edges
- Compatible repair mesh or fasteners for the enclosure you own
- A temporary covered holding container for the flock
- A written checklist for doors, roof, seams, corners, and floor contact
Step-by-step
Step 1: Secure the birds and make the inspection safe
Move the quail into the temporary covered container and close nearby exits first. Put repair supplies beside the run. You need an empty enclosure so a bird cannot slip through while your attention is on a seam or latch.
Step 2: Find the exact escape route
Check the access door, latch, side doors, detachable panels, roof edges, wire-to-frame seams, corners, tray openings, and every place the run touches the ground. Shine the flashlight from both sides. Look for daylight, movement, lifted edges, and openings that appear when a panel or tray is removed.
If escapes happen during feeding or cleaning, prepare everything before opening. Keep birds away from the opening, use only the access point you need, and close every latch when finished.
Step 3: Close the route with a compatible repair
Fit the repair mesh, fastener, or adjustment to the existing frame. Check the repair by pushing gently on the edge and viewing it from inside and outside. A quick patch that leaves a loose corner simply moves the escape route.
Step 4: Secure the roof and manage upward impact
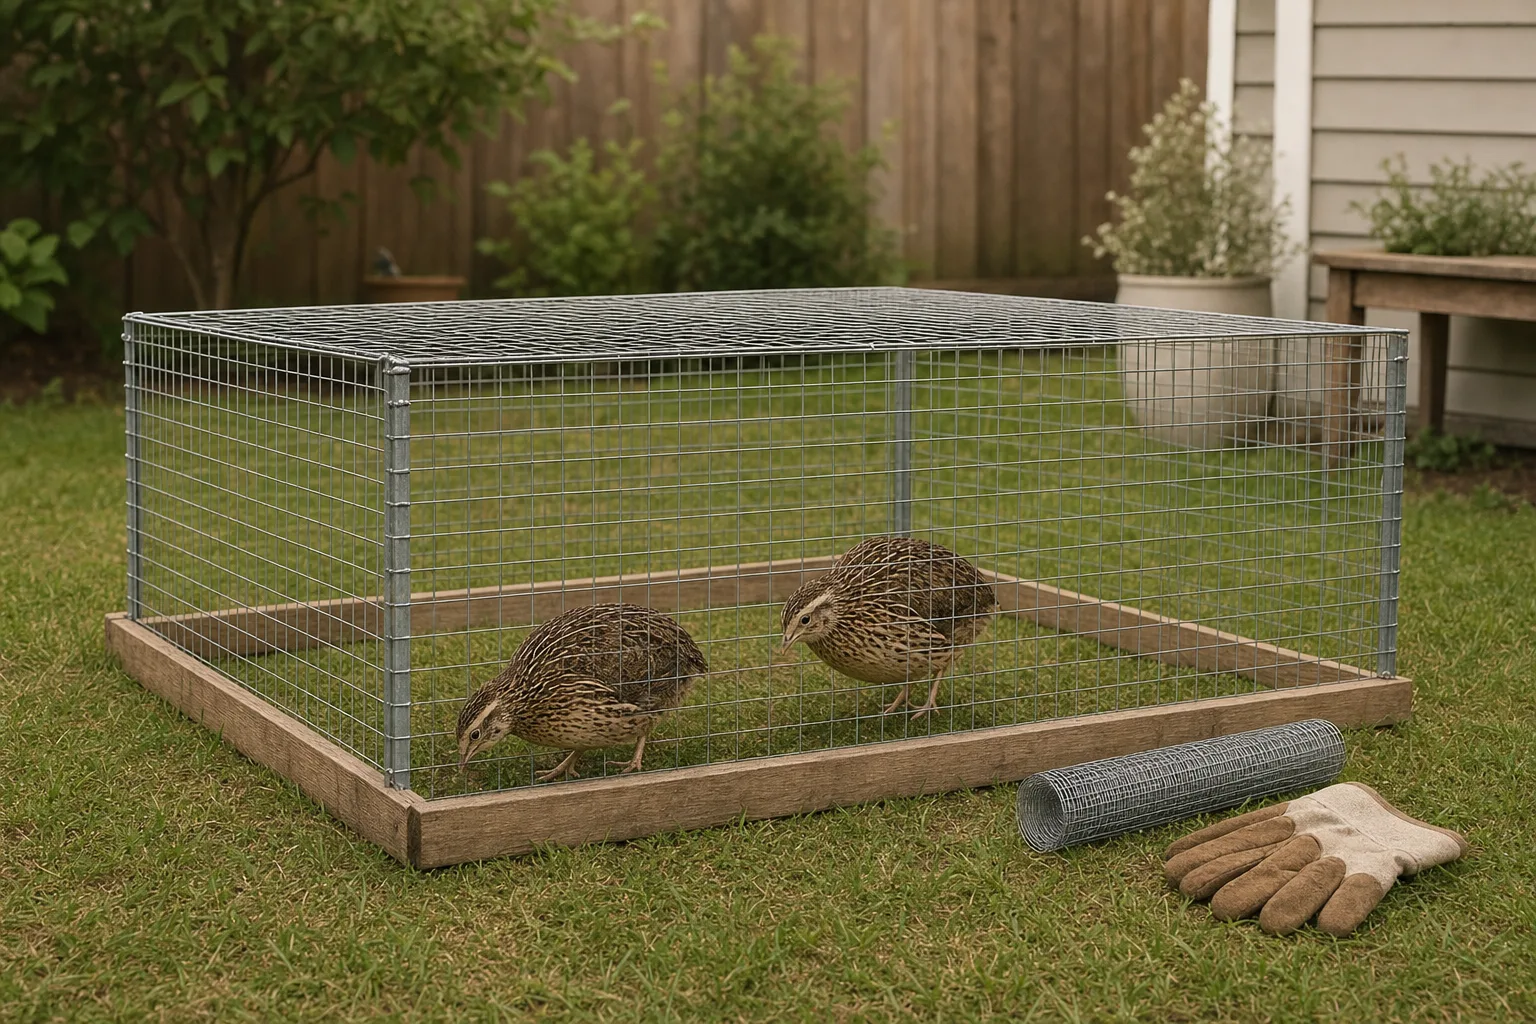
Cover the complete overhead plane and inspect the roof-to-frame connection, including the edges rather than only the center. Quail can leave through an uncovered or badly fitted top. If the bird compartment is taller than the practical 8–12 inch cage range, add a soft roof or another impact-reduction plan.
For outdoor placement ideas, compare shade, weather cover, airflow, and access in our outdoor quail cage comparison. A roof claim in a listing still calls for a look at runoff, seams, and openings.
Step 5: Make door opening a controlled routine
Prepare feed, water, tools, and the holding area before you open the run. Stand clear of the door swing, keep the flock away from the opening, and use one access point at a time. Test the latch by closing it fully, then inspect side or detachable doors even if you rarely use them.
Step 6: Test the empty run, then release calmly
Walk around the empty enclosure and check the roof, seams, corners, latches, tray opening, and ground edge again. Move the door as you would during cleaning. Once it passes, return the birds while watching the access points and their first movement through the run.
If one gets out, secure the remaining flock and close nearby exits before reducing the commotion. Work in a contained area, keep your movements slow, and use the familiar enclosure, food, and water as the destination when practical. If the bird appears injured or unwell, secure it and contact a veterinarian or extension office.
Step 7: Record the failure point and repeat the check
Write down where the bird got out and what you changed. Recheck floor contact, frame joints, panels, roof edges, and latches after moving the run or after heavy weather. An enclosure that holds birds in is one part of outdoor care. Predator control still needs its own inspection.
Common mistakes
- Trusting marketing labels. Weatherproof, predator-safe, and small-animal capacity claims do not replace an inspection.
- Checking one door. Side and detachable doors can be the route you miss.
- Viewing one side. A lifted floor edge or loose seam often shows from the opposite side.
- Leaving the top open. Tall hard compartments also need an impact-reduction plan.
- Opening too soon. Get supplies and the holding container ready first.
- Skipping the empty test. Return birds only after checking latches and the perimeter.
- Adding space alone. More room does not close a missing roof or loose door.
Each mistake gives you a false sense of security. Treat the run as connected panels and access points, then check the whole set after any repair or relocation.
Troubleshooting
They escape as soon as I open the door.
Check the door swing, latch engagement, nearby side doors, and your prepared holding area before opening. Keep birds away from the opening and close the door as soon as the task is done.
They get out over the top.
Inspect the complete roof plane and every roof-to-frame seam. Secure the cover and address impact risk in the bird compartment, especially when its height exceeds the practical cage range.
They disappear near the ground.
Inspect the full perimeter where the run touches soil or grass, including corners and uneven areas. Remove lift points and secure the edge. For a separate predator review, use our predator-proofing checklist.
The run is secure until I move it.
Recheck floor contact, frame joints, panels, and latches after every relocation. Uneven ground can open a route that was closed on the previous spot.
I repaired one gap and they still escape.
Repeat the inspection from inside and outside. A second route may be at a side door, roof edge, tray opening, or seam.
How much space does a quail coop and run need?
A wire cage needs at least 1 ft² per Coturnix, with 1.5 ft² kinder. A ground pen or aviary needs 2 ft² or more per bird. Measure usable bird floor, then divide it by the number of birds. Use our quail stocking guide for the same math, and ignore seller chicken-capacity labels.
How high should an outdoor quail coop be?
Keep the bird compartment around 8–12 inches where practical. Overall hutch height can include legs, roofing, and an elevated structure. Focus on the space the quail occupy. A taller compartment needs a soft roof or another impact-reduction plan.
What makes a run suitable for outdoor quail?
Look for shade, dry shelter, airflow, secure seams, working latches, a roof that sheds rain, and a mesh enclosure that prevents escapes. Grass and soil bring different perimeter and sanitation checks than an elevated wire hutch. Penn State Extension's Small Scale Poultry Housing page is a useful source for general housing principles.
Is a quail hutch with run better than a wire cage?
Choose a hutch/run for sheltered outdoor access and a wire cage when easy egg collection and manure management matter most. Compare usable floor, compartment height, cleaning access, weather exposure, and predator control. A larger format still needs secure doors and a roof. See our quail cage picks for another housing format.
What should a buyer do in hot or cold weather?
Keep housing dry and draft-free to about 20°F / −7°C, and watch for heat stress above about 90°F / 32°C. Place the run in shade with airflow and weather cover. If you are concerned about a bird, contact a veterinarian or extension office.
How many males can share an outdoor quail run?
Plan on 1 male to 4–5 females, with 1:3 as a minimum. Extra males can fight, and more run space does not fix a poor ratio. Make a separate plan for extra males rather than forcing an unstable group together.
Frequently asked questions
Can quail fly out of an outdoor run?
Yes, so give the run a fully secured top. Inspect the whole roof plane, its edges, and every opening where it meets the frame. Work from the assumption that a startled Coturnix can leave through a poorly fitted overhead section, then test the enclosure empty.
How do I stop quail digging out of a run?
Inspect the complete perimeter where the run meets soil, grass, boards, or hard ground. Remove stones and uneven spots that create a lift point, then secure the edge with a compatible barrier or frame treatment. Repeat the inspection after moving the run or after heavy weather.
Should a quail run have a roof?
Yes. A secure roof helps contain birds and gives the run overhead protection. If the bird compartment is taller than the practical 8–12 inch cage range, use a soft roof or another impact-reduction plan because a startled bird can strike upward.
What do I check when quail escape through the door?
Check latch engagement, the door frame, the swing path, and every side or detachable door. Prepare feed, water, tools, and the holding container before opening. Use the access point you need, then close and test each latch before moving on.
Can a taller hutch be safer for quail?
Outside height can include legs and roofing, so judge the bird compartment instead. The practical cage-height range is 8–12 inches. A taller compartment needs a soft roof or another impact-reduction plan, plus checks for loose seams, drafts, and escape openings.