 Quail Corner

How to Set Up a Quail Brooder Box (2026): 7 Safe Steps
Set up a secure box with a warm side, cooler side, safe floor, feed, water and monitored heat before your quail chicks arrive. This seven-step method works for newly hatched Coturnix and button quail without a woodworking project.
How to Set Up a Quail Brooder Box
A repeatable seven-step setup for newly hatched quail
Step 1 Gather and clean
- Collect the box and supplies
- Clean and dry each surface
Step 2 Choose the location
- Pick a stable, draft-protected spot
- Leave room to inspect the box
Step 3 Prepare the floor
- Fit a solid or chick-safe floor
- Secure the cover and small gaps
Step 4 Place the heat
- Heat one side of the box
- Secure the source and cords
Step 5 Add feed and water
- Use accessible dishes
- Keep them on the cooler side
Step 6 Check for hazards
- Check chick-level temperature
- Inspect airflow and escape points
Step 7 Introduce and monitor
- Place chicks in the box
- Watch where they settle
Result
A secure brooder with a warm side, cooler side, safe floor, clean supplies and monitored heat.
Quick answer
Prepare and test the brooder before moving chicks in. For Coturnix, aim for 95°F / 35°C at chick level in week one, then reduce by about 5°F per week. Keep the heat on one side so chicks can move away, and check the floor, airflow, water, cover and cords.
For a ready-made starting point, see our quail brooder box picks. The supplied LIAQICHA listing describes a 15.7 x 12 x 12-inch wood-and-acrylic box with a 110V, 50W adjustable-brightness lamp, feeder, waterer and bedding. Treat those as listing details, not a stocking guarantee. Verify the current listing, ventilation, lamp clearance and usable cooler area.
What you'll need
Gather everything before the hatch. A complete kit bundles several pieces, while a plain plastic or wood container needs each one chosen separately.
- A secure brooder box or container with a cover
- A heat source and a quail brooder thermometer
- A solid floor, or 1/4-inch floor wire if wire is used, plus clean bedding
- Game-bird starter and a chick-safe quail waterer
- Clips or another way to keep the cover, heat source and cords secure
Our Top Picks
How do you set up a quail brooder box?
Complete these seven steps before the chicks arrive. Build a box they cannot escape, with heat they can approach or leave and supplies they can reach without crossing a hazard.
Step 1: Gather and clean the equipment
Collect the box, thermometer, heat source, floor, bedding, starter, waterer and cover. Wipe washable surfaces, let them dry, and check doors, mesh, zippers and seams for gaps.
Step 2: Choose a stable, draft-protected location
Set the brooder on a stable surface where you can see and reach it easily. Block a direct draft, but leave enough open area or venting for fresh air. Mississippi State Poultry Science's brooding guidance stresses good ventilation without air blowing across the birds.
Step 3: Prepare the floor and secure the enclosure
Fit a solid floor with clean, non-slip bedding, or use 1/4-inch floor wire if wire is needed. Large openings can trap tiny feet. Button quail especially need a solid or 1/4-inch floor and a soft or low roof because they jump straight upward.
Close the cover, door and mesh securely. Fabric kits are portable, but inspect their bottom mat, zippers and small gaps. Solid wood or plastic boxes are easy to observe, yet still need ventilation and a cleanable floor.
Step 4: Install and secure the heat source on one side
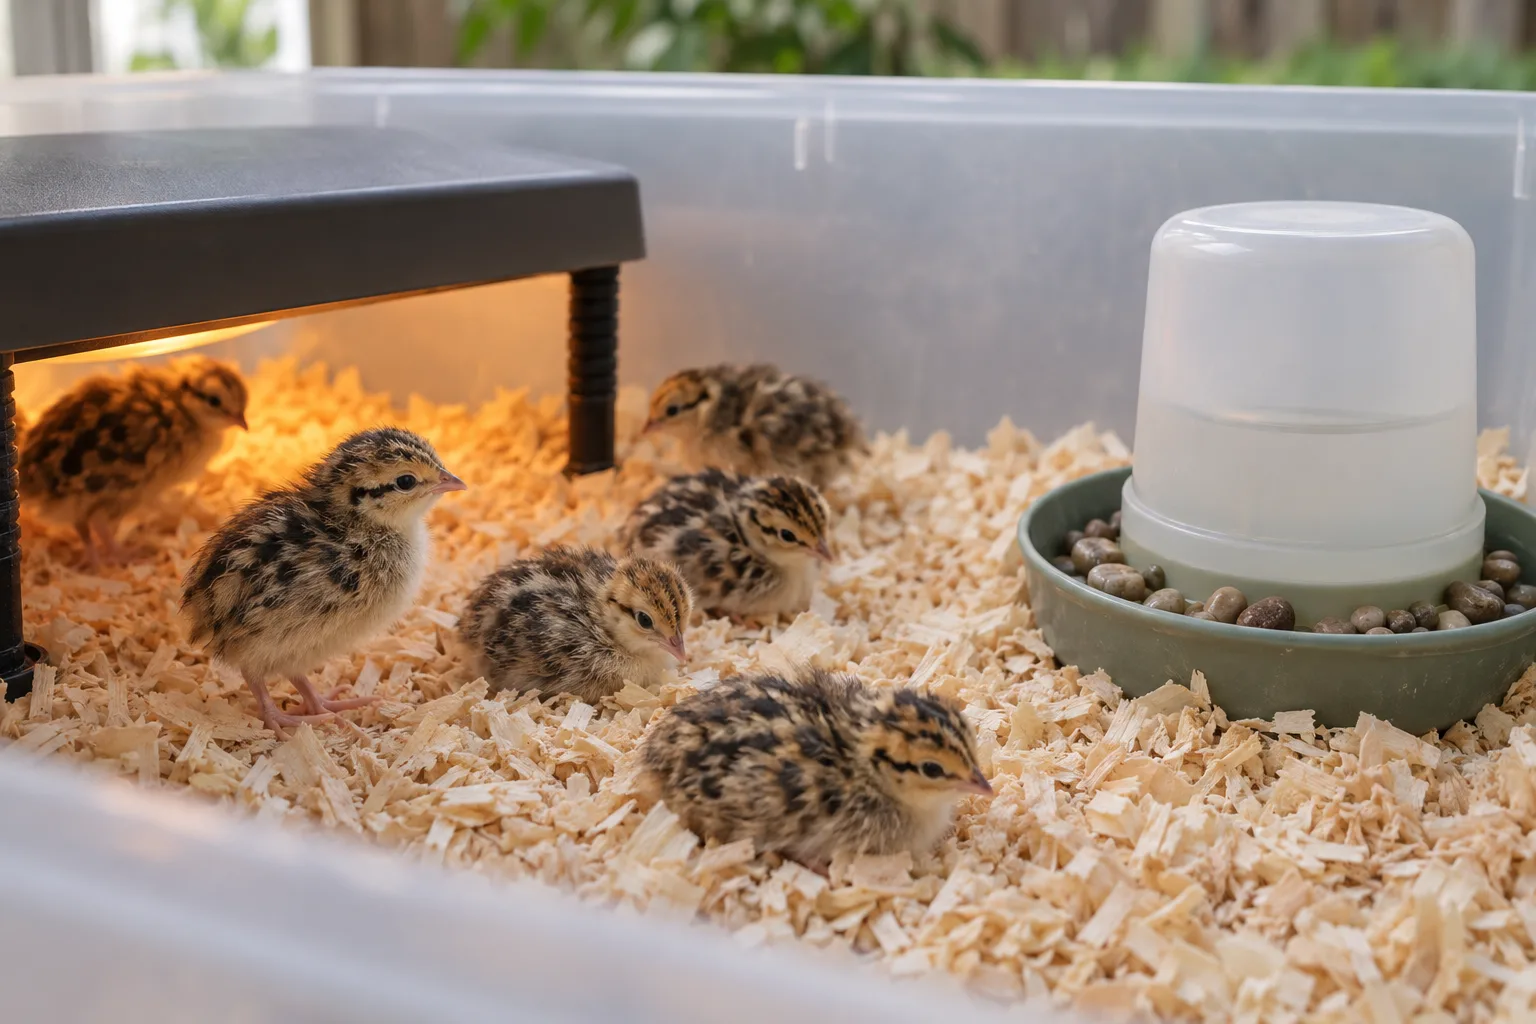
Place the lamp or heat plate at one end, not over the whole enclosure. Secure it so it cannot fall, and keep cords outside the chicks' reach. A heat plate provides radiant warmth, while a lamp needs careful clearance and monitoring.
Mississippi State University Extension lists 95°F / 35°C at chick level in week one for brooding quail. Use that as the warm-side starting point, with a cooler side available for choice.
Step 5: Add feed and chick-safe water on the cooler side
Put game-bird starter in a low, stable feeder and place shallow water where chicks can reach it without walking beneath the heat. Stabilize the waterer and use a chick-appropriate design. Button quail need extra care around water because they are tiny.
Step 6: Test temperature, ventilation, access and escapes
Run the setup before the hatch. Take the temperature at chick level. If you still need a heat source, compare our quail heat-plate picks, then check that the box has a warm zone and a cooler zone. Inspect every door edge, mesh seam and cord route.
Make adjustments before the chicks arrive. The thermometer gives you a number. The chicks will show you how the box feels.
Step 7: Introduce chicks and monitor their distribution
Place the chicks in the prepared box and watch where they settle. When the setup is right, chicks spread through the enclosure instead of piling under the heat or avoiding it. If they crowd or flee the heat, recheck the setup safely.
Reduce temperature by about 5°F per week. Coturnix generally move to grow-out at 3–4 weeks when fully feathered, and warm-weather birds are generally off heat by 3–4 weeks.
Check the current LIAQICHA listingWhat common brooder mistakes should you avoid?
A safe brooder prevents small problems from becoming urgent ones. Check these points before you leave the chicks alone.
- Slippery flooring: Use a solid floor with traction, or suitable 1/4-inch wire. Large wire openings and slick surfaces are poor choices for new chicks.
- Deep water: Choose a shallow, stable waterer that chicks can reach without climbing or falling in.
- Direct drafts or a sealed box: Add ventilation while keeping air from blowing straight across the chicks.
- Inaccessible supplies: Keep feed and water on the cooler side where every chick can reach them.
- Unsecured heat: Secure the source, route cords away from chicks, and keep monitoring it.
- Escape gaps: Check doors, mesh, zippers and corners. Button quail also need a soft or low roof.
What should you do when the brooder setup goes wrong?
Use behavior as a prompt to check the setup, then make one safe adjustment at a time. For repeated losses or a chick that appears unwell, contact a poultry veterinarian or extension office.
Chicks are packed tightly under the heat
Recheck the thermometer at chick level and inspect the warm zone. Adjust the heat source safely, keeping the cooler side open, then watch the group again.
Chicks avoid the heated side
Check whether the source is too close or the warm zone is too intense. Make a safe adjustment and recheck the temperature and chick distribution.
The box feels stale or drafty
Improve ventilation without creating a direct draft across the chicks. A covered box still needs fresh air, and an open mesh kit still needs protection from moving air.
Water spills or chicks cannot reach it
Stabilize the waterer and switch to a shallow, chick-appropriate design. Move it away from the heat while keeping it easy for the smallest chick to find.
Chicks reach a gap or cord
Stop and secure the enclosure before leaving them unattended. Close the gap, reroute the cord outside reach and check the whole perimeter again.
Frequently asked questions
What is the best brooder setup for quail?
Choose a secure enclosure with a warm zone, a cooler zone, a solid or chick-safe floor, reachable feed and water, and ventilation without a direct draft. For Coturnix and button quail, start at 95°F / 35°C at chick level in week one, then reduce by about 5°F per week.
What is the best brooder for baby quail?
Choose a box that contains tiny chicks, lets you watch them, and provides monitored heat with room to move away. The LIAQICHA all-in-one example includes a box, feeder, waterer and heat lamp. Verify its current listing, ventilation and usable warm and cooler areas before buying.
What is the best brooder for quail chicks?
A complete box can simplify a first setup because several pieces arrive together. A secure DIY container plus a suitable heat source works too. The floor, cover, ventilation, cords and escape points still need a chick-level safety check.
What temperature should a quail brooder be?
Set 95°F / 35°C at chick level in week one for Coturnix or button quail. Reduce the brooder temperature by about 5°F per week. Measure where the chicks stand, and keep a cooler area so they can move toward or away from the heat.
How long do quail chicks stay in a brooder?
Coturnix generally move to grow-out at 3–4 weeks when fully feathered. In warm weather, they are generally off heat by 3–4 weeks. Use feathering, chick behavior and safe housing conditions to guide the move instead of the calendar alone.
Is a brooder box or heat plate better for quail?
They solve different problems. A box contains and protects chicks, while a heat plate provides radiant warmth. There is no universal winner. Either choice still needs secure placement, ventilation, temperature checks, reachable feed and water, and a cooler area.