 Quail Corner

How to Set Up a Button Quail Brooder: Safe 2026 Steps
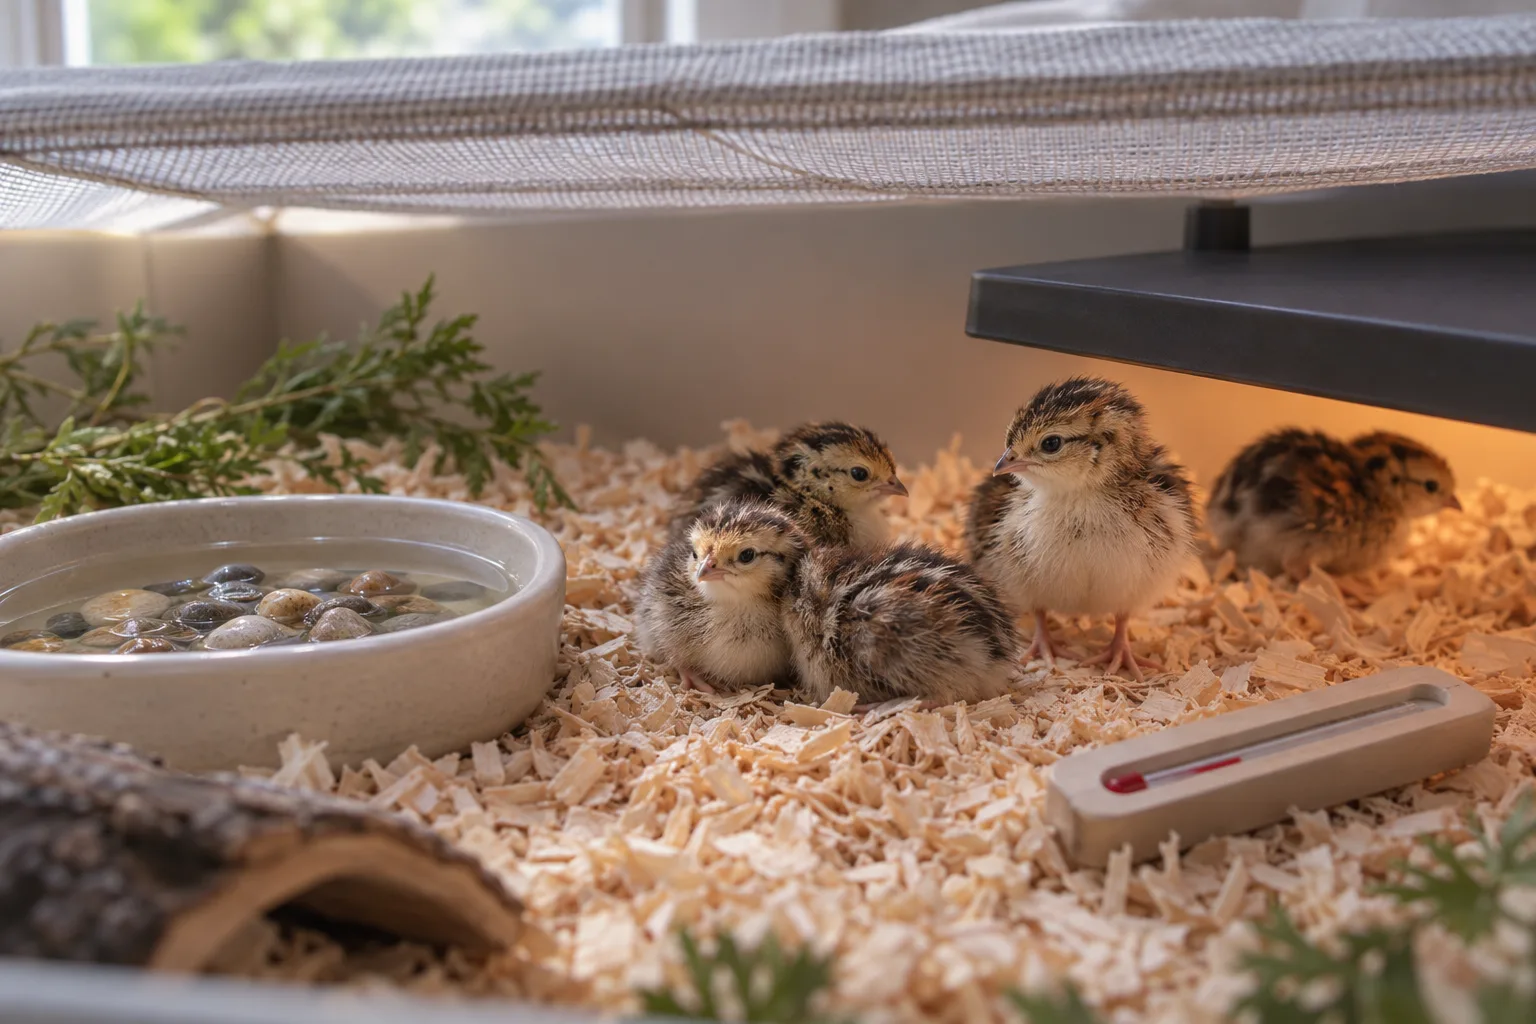
Build a warm-side/cool-side brooder for tiny button-quail chicks, with a secure floor, protected water, and a soft or low roof that stops a straight-up jump becoming an escape.
Button quail brooder setup
A five-step setup for tiny, quick-moving chicks
Step 1 Gather the supplies
- Choose the enclosure and floor
- Set out bedding, feed, water, and a thermometer
Step 2 Prepare the enclosure
- Make a warm side and a retreat
- Fit a soft or low secure roof
Step 3 Warm and measure
- Place the heat source at one side
- Check 95°F at chick level
Step 4 Add feed and water
- Use a shallow protected water dish
- Make feed easy for chicks to find
Step 5 Inspect before arrival
- Check seams, cords, lid, and openings
- Watch the first settling-in period
Result
A warm-side/cool-side brooder with a safe floor, protected water, and no easy escape route.
What is the safest button quail brooder setup?
Use an escape-resistant enclosure with a solid floor or ¼-inch floor wire, heat on one side, and a cooler retreat. Set 95°F at chick level for week one, then drop the target 5°F each week. Give chicks accessible feed and shallow water with marbles or pebbles.
The Brinsea Ecoglow Safety 600 is the overall fit because it provides radiant 12-watt, 12-volt heat, adjustable screw-on legs, a clear cover, and a power supply. The catalog places it in the $$ band. The RentACoop 10 x 10-inch plate is a compact $$ alternative with height and tilt adjustment. Compare our button-quail brooder picks for the wider equipment choice.
What you'll need
- Enclosure: A solid-sided box or tub with a secure, soft or low roof. Button quail jump straight up, or “boink,” so extra height does not solve containment.
- Floor and bedding: A solid floor or ¼-inch floor wire with bedding that stays flat and dry.
- Heat and thermometer: The Brinsea Ecoglow Safety 600 is the overall recommendation. It has radiant 12-watt, 12-volt heat and adjustable screw-on legs. The RentACoop plate is 10 x 10 inches, uses 15 watts, and offers 25 height settings from 1–9 inches.
- Food and water: Chick feed, a stable shallow dish, and marbles or pebbles for the water.
- Room to work: Leave a warm zone and a retreat. Use this brooder sizing guide when planning the enclosure.
If your homemade container needs a better lid, cord routing, or easier cleaning, follow how to build a simple brooder box. Check the Brinsea plate Check the RentACoop plate
Step-by-step
Step 1: Build the enclosure and floor
Choose a solid-sided enclosure and fit a solid floor or ¼-inch floor wire. Add flat bedding for secure footing, then fasten a soft or low roof so a startled chick cannot jump through a gap.
Phil’s Best Button Quail recommends solid-sided containers and avoiding drafts. Check every seam, corner, feeder opening, and lid edge. Tiny chicks find gaps you would ignore.
Step 2: Put heat on one side
Place the heat plate at one end and leave the other end as a cooler retreat. The Brinsea uses adjustable screw-on legs. The RentACoop offers 25 height settings from 1–9 inches and tilt adjustment. Set either as its instructions direct and keep it stable.
Inspect the cord, keep it clear of bedding and water, and follow the maker’s clearance instructions. Do not heat the whole box. Chicks need room to move away from warmth.
Step 3: Check 95°F at chick level
Turn the heat source on before arrival. Measure at the floor where a chick will stand, close to the warm zone, and adjust until it reads 95°F for week one. Recheck after the enclosure warms and whenever you change plate height.
Reduce the target by 5°F per week. Chicks huddling under the source need more warmth; chicks avoiding it need a cooler setup. Use the thermometer and their behavior together.
Step 4: Add feed and protected water
Put feed where chicks can find it without crossing the hottest area. Use a shallow, stable water dish with marbles or pebbles so tiny birds have less open water to fall into.
Keep the dish away from the heat source. Replace wet bedding promptly if water spills.
Step 5: Inspect every escape and safety point
Close the lid and test the seams, corners, feeder opening, and floor edges. Check the cord, heat-source stability, and water dish before the chicks enter.
Stay nearby while they settle. They should reach warmth, feed, and water without being trapped in one zone. Keep following the temperature schedule as they grow.
Common mistakes
- Larger floor openings: Replace them with a solid floor or ¼-inch wire.
- Heat over the whole enclosure: Move the source to one side so chicks can choose their comfort zone.
- Open water: Use a shallow stable dish with marbles or pebbles.
- A loose lid: Secure a soft or low roof and test every edge.
- Trusting a plate setting alone: Check 95°F at chick level with a thermometer.
Troubleshooting
Chicks stay pressed under the heat source
Check 95°F at chick level and look for a draft or a plate set too high. Make one adjustment, then recheck the floor temperature.
Chicks avoid the heated side
Measure the warm zone. If it is too warm, adjust the source only as its instructions allow while keeping the cooler retreat open.
Water keeps spilling into the bedding
Move the dish to level ground away from the busiest path. Secure its base, replace damp bedding, and keep the marbles or pebbles in place.
A chick finds the edge or lid
Inspect the exact gap at the seam, feeder opening, or corner. Close it, then recheck the whole enclosure. Button quail jump straight up, so repair the route.
Frequently asked questions
What temperature should a button quail brooder be in the first week?
Set 95°F at chick level during week one. Reduce the target by 5°F each week after that. Measure where the chicks stand, not beside the brooder or high above the floor.
Is a heat plate suitable for button quail chicks?
Yes, if it sits on one side and leaves a cooler retreat. Adjust its legs or height as the maker directs, then check the actual brooder at chick level. A plate is a heat source, not a universal temperature dial.
What floor is safest for button quail chicks?
Use a solid floor or ¼-inch floor wire. Button-quail chicks are tiny, so larger openings can catch feet or become escape routes. Keep bedding flat and secure, and inspect the floor edges before the chicks arrive.
How do you keep button quail chicks from drowning?
Use a shallow, stable water dish with marbles or pebbles in it. Put the dish on a level spot where bedding cannot tip it, then check often for spills, fouling, or blocked access.
How long do button quail need supplemental heat?
No fixed cutoff is established for button quail. Follow the 5°F-per-week schedule and watch feathering and behavior as you adjust the setup. Do not swap in a guessed age for those checks.