 Quail Corner
Fastest DIY Base
Little Giant® Quail Waterer Base - 1 Quart Screw On Base with Narrow Channel - Designed for Quail and Baby Poultry Chicks - Made in USA (Red, Pack of 1)
$
Check Price on AmazonYou can make a clean quail waterer three ways for a few dollars: a nipple bottle from a leftover jar, a gravity cup line, or a quick jar-and-base. When the parts and the trial time add up to more than the ready-made answer, our quail water picks cover automatic, nipple, cup and chick models that need zero DIY.
Pick the route that fits what you already own, size it to your flock, and skip the daily juggle
A clean, steady waterer that fits your flock and your free time
Pick the route that matches what you own. The nipple bottle keeps the water covered and needs the least topping up. The gravity cup line ends daily refills across a multi-cage rack. The jar-base rig is the fastest to assemble, a 10-minute job start to finish. All three size the same way, by counting birds, and each has a ready-built twin in the waterer roundup if you would rather skip the build.
Choose one build and gather its parts. The three routes share one rule: keep the water small or off the floor, so chores stay light and chicks cannot tip a pan.
$
Check Price on Amazon
$
Check Price on Amazon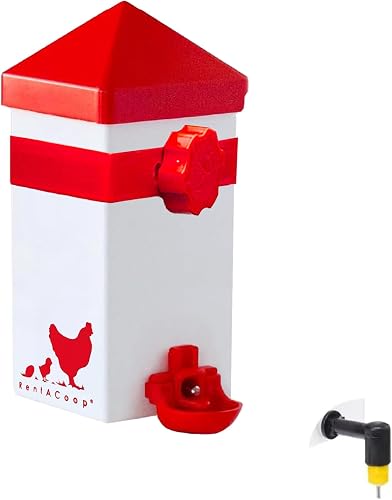
$$
Check Price on AmazonBuild the cheapest route from a drink bottle you have. Drill a cap just big enough for the nipple valve to push through, screw it in, fill the bottle, then invert it and leave the valve flat against the cage wire above the birds. Test it over a spill tray before you trust it, because a valve that drips will turn a clean pen floor into mud in a day.
With a box of wire cups and a short length of 3/8-inch line, you can serve several cages from one reservoir. Mount each cup at chick height, run the line above the cage, and split it with Y connectors so two cups share one feed. The cups in the 10-pack screw into the wire and hold a shallow pool, which is exactly what you want around young birds.
The quickest of the three is a spare quart jar threaded onto a narrow-channel base. Fill the jar, screw the base on over the mouth, then flip the whole thing so the base sits on the pen floor and the jar feeds down through the channel as the birds drink. No cap drill, no line, no Y connectors, and a shallow channel that is safe for chicks.
Count the adults first, then match the reservoir to a refill you can hold in a normal day. A full-grown coturnix drinks about 1 to 1.5 fluid ounces per day, more in summer heat. A 1-quart jar holds 32 ounces, so expect 20 to 30 birds per fill on a mild day, and check sooner when the mercury climbs. The same count works in reverse: a 10-bird pen is fine on a pint of water twice a day, no need to oversize and wash a big tank you only half use.
If the nipple leaks, seat it deeper or wrap the thread in plumbing tape. If the drip is constant, the bottle is hanging too low, so raise the reservoir so the valve sits above the pool.
Check the line is not kinked and the reservoir sits above the highest cup. Bleed trapped air by priming the line low, then push the bottle once to seat the valve.
Lower the cup or hinge the bottle down so the valve sits at chick shoulder height. If they still cannot trip it, put a shallow pebble tray under the valve for a week.
DIY only saves money while the parts and your trial time stay cheap. One leaky valve on a two-week-old build can swallow a whole evening, and then the ready-made bottle starts to look like the better deal. That is the honest trade: the nipple bottle costs you about twenty minutes plus a nipple, the gravity cup line ends the daily refill but needs a real run of 3/8-inch pipe, and the jar base is the easy one, no line, no drilling, just a jar and a base that clip together.
When your parts total starts climbing toward a ready-made bottle that ships with both a chick and an adult nipple, buy the bottle and get back to your birds. The ready-made waterer here is the same idea done for you.
A clean BPA-free bottle with a collar cap works fine, as long as the nipple threads onto it. Mass-market soda and water bottle caps share a soft thread, so most nipples seat with a drill guide only.
A wide open tray lets a tiny button chick or a hatchling tip in and dunk itself. Put smooth marbles or pebbles in the dish so they can stand and dry, or run a covered nipple route from day one until they are strong enough to trip it.
A full-grown coturnix drinks about 1 to 1.5 fluid ounces a day, more in summer heat. A 1-quart jar holds 32 ounces, so it covers 20 to 30 adults on a single refill on a mild day.
Only while the parts and your trial time stay cheap. A jar-and-base rig is the cheapest build, but the jar is sold separately. When the parts add up to the ready-made price, the store bottle that already ships with chick and adult nipples is the smarter buy.
Set the drinking point at chest height for the birds, so they drink without tipping the setup or climbing the wire. Too far off the floor for a chick group, and they cannot reach it.