 Quail Corner

How to Set Up No Waste Quail Feeder (2026): 7 Steps
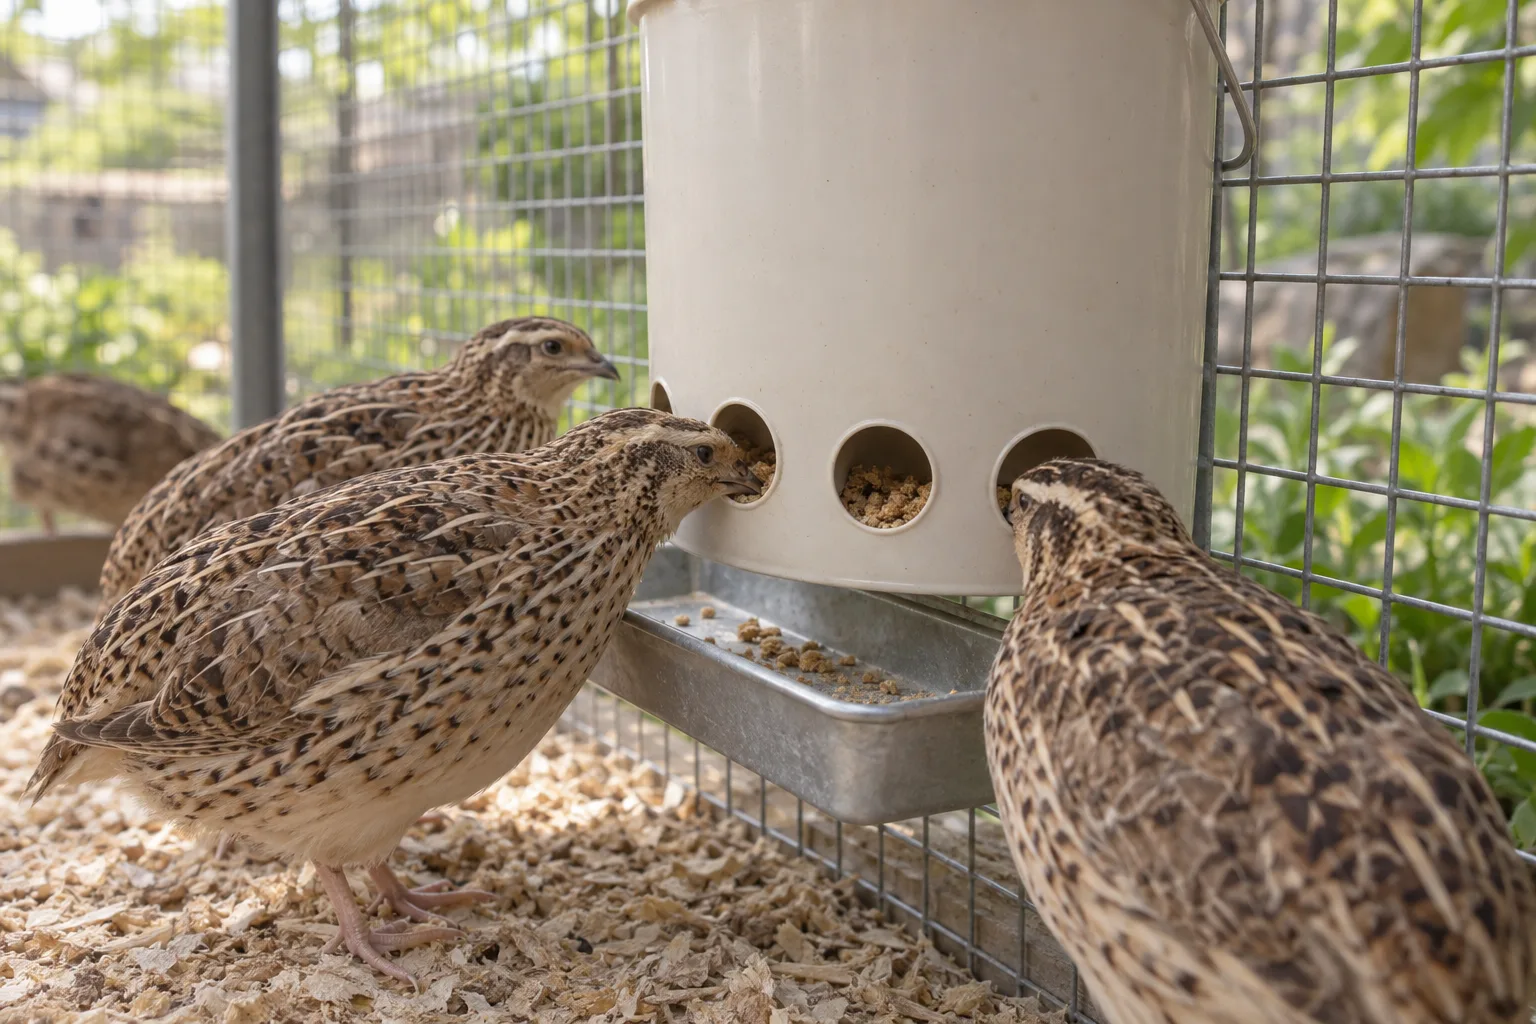
Set up a no waste quail feeder by putting feed behind well-fitted ports, mounting the container firmly outside the cage, and watching the first feeding. The goal is less spilled crumble, not a promise of zero waste.
How to Set Up a No Waste Quail Feeder
A repeatable 7-step setup for cleaner adult-Coturnix feeding
Step 1 Choose the container
- Pick a complete feeder or sound container
- Match the design to the birds
Step 2 Fit the ports
- Place openings above the feed line
- Smooth every cut edge
Step 3 Mount and check
- Secure the feeder outside the cage
- Watch every bird use it
Result
A covered or ported feeder that gives your adult Coturnix access while keeping loose crumble in the container.
Quick answer
For adult Coturnix, choose a complete outside-hanging unit if you want the shortest route. If you have a suitable bucket or tub, fit a port kit, smooth the cuts, and mount the container so the birds reach without stretching or climbing.
Feed reference is approximately 1 oz (25–30 g) per adult per day. Use that figure to plan refills, not to promise a fixed number of days from a listing capacity. For the broader choice between complete feeders and port kits, see Best no waste quail feeder (2026): 7 picks.
What you'll need
- Complete route: A ready-made feeder, its included hardware, and a shallow tray or tile below the cage area.
- DIY route: A clean, food-safe bucket, tub, or similar container, plus ports. The 2B Creations port kit is a container-free option for a custom build.
- Tools: A drill and hole saw sized for the chosen ports, a file or sandpaper, and a way to hold the container while cutting.
- Before birds use it: Dry feed, a stable mount, and time to watch access. Adult Coturnix normally use 1/2 in × 1/2 in floor wire, but that is not a universal feeder-opening measurement.
If you want detailed bucket, tub, and PVC alternatives, read Homemade Quail Feeders: 3 DIY Builds for 2026. Farmstead Guide covers the same bucket and PVC routes, while the Backyard Chickens thread on a simple DIY no-waste feeder is useful for seeing how keepers work out port placement. A complete unit skips most cutting. The RentACoop four-port kit includes a hole saw, which can make the DIY route easier if you do not already own one.
See the complete feeder optionOur Top Picks


Step-by-step
Step 1: Choose a design and container
Pick the complete outside-hanging route for speed, or choose a clean, rigid container for a DIY build. The container needs a lid, enough room for dry crumble, and a shape you can mount without wobbling.
Keep the life stage in view. The CluckRoots listing specifies adult Coturnix, while the 2B port listing says its ports fit button quail through large Coturnix. A port that works for one bird is not automatically safe or comfortable for another.
Step 2: Plan port height and spacing
Hold the empty container against the cage and mark openings where each bird can reach with its feet on the floor. Keep the feed line below the openings so a beak reaches forward into the container rather than lifting feed out.
Follow the port maker's hole-size directions. Do not turn the adult 1/2-inch floor-wire figure into an opening rule. If the design includes covers or rings, leave enough flat container surface for them to sit tightly.
Step 3: Cut the openings safely
Clamp or steady the container, drill clean openings, and remove every sharp burr with a file or sandpaper. Fit each port before filling the feeder. A loose ring, ragged edge, or cracked plastic can catch feathers and make birds avoid the feeder.
The tube-and-port idea is simple, as the Instructables build shows, but the finish matters. Keep the lid easy to remove and avoid hidden ledges where damp crumble can collect.
Step 4: Fill and close the container
Add a small amount of dry crumble first, then close the lid. This gives you room to inspect the ports and lets you find leaks without wasting a full refill.
For the complete route, check the listing instructions and make sure the feed-level window, lid, and port area are clear. A stated capacity is a listing specification, not a guarantee about refill timing.
Step 5: Mount it outside the cage
Hang or fasten the feeder so the container cannot swing, tip, or pull cage wire out of shape. The CluckRoots listing says it fits common 1/2-inch × 1/2-inch and 1/2-inch × 1-inch mesh. Your actual cage still needs a physical fit check.
Keep the feeder protected from rain and direct splash. Adult Coturnix cages are commonly 8–12 in high, so keep the openings reachable from the cage floor instead of making birds stand on a roll-out edge. A roll-out floor helps collect eggs; it does not solve feed spills. Put a shallow tray or tile below the feeding area to catch the small amount of crumble that escapes, a catch-tray approach described by Silver Homestead.
Step 6: Run the first access check
Watch every bird eat. Look for stretching, repeated head turns, shoulder crowding, or birds waiting behind a dominant flock mate. Raise or lower the feeder in small adjustments until the group reaches comfortably.
Observe the floor after the first feeding. A little stray crumble is expected. A growing pile points to a port that is too open, a container that moves, feed placed too high, or birds that cannot reach naturally.
Step 7: Clean, refill, and review
Remove damp or dirty feed, wipe the port area, and check the mount each time you refill. Once the feeder has stayed dry and stable, make it part of your normal cage-cleaning routine.
Keep a simple eye on feed use and the floor below. If waste remains high, change one thing at a time so you can tell if the issue is access, port fit, mounting, or flock behavior.
Common mistakes
- Cutting before checking the cage: Hold the container in place first. A perfect port pattern is useless if the mount sits too high or conflicts with the wire.
- Leaving sharp edges: File every cut and test it with a cloth before birds use it. The cloth catches burrs your fingers can miss.
- Filling to the top on day one: Start with a small amount, watch for leaks, and then refill. This also makes a dirty or damp spot easier to find.
- Calling reduced waste zero waste: Keep a catch tray and inspect the floor. Port designs control access, while they do not remove every bit of spilled crumble.
Troubleshooting
Feed is still scattered below the ports
Check that the container is level and cannot swing. Then inspect port fit, feed height, and the birds' reach. Add a shallow catch tray, change one adjustment, and watch the next feeding. For a symptom-first checklist, read Quail Wasting Feed: 7 Fixes for Cleaner Feeders (2026).
Birds ignore the new feeder
Leave the feeder in place with a small amount of familiar dry feed and watch from a distance. Check for glare, a sharp edge, a blocked port, or an opening that sits outside their comfortable reach. If birds still cannot access feed or show a persistent welfare concern, talk to a poultry vet or extension office.
The container shifts or pulls on the cage
Empty it, strengthen the mount, and make sure the cage wire is supported at the attachment point. A moving feeder encourages spills and can make birds avoid the ports. Do not rely on a loose hook or a single weak tie.
Feed becomes damp or clumps
Move the feeder out of rain and splash, improve the lid seal, and remove damp feed promptly. Keep the container easy to open so cleaning does not become a chore you put off. Persistent concerns about birds eating or drinking belong with a poultry vet or extension office.
Frequently asked questions
What is the best no mess quail feeder?
For adult Coturnix, a complete outside-hanging feeder is the simplest starting point. The CluckRoots unit is listed with three 1.5-inch ports, approximately 4 lb capacity, and fit for common adult cage mesh. Check the opening and mounting against your cage before buying.
What feeder stops quail from wasting feed?
A ported feeder usually controls spills better than an open dish because the birds reach through a small opening instead of raking feed outward. It cannot stop every loss. Correct height, a stable mount, and a catch tray still matter.
How do I stop quail from wasting feed?
Move the feed behind ports, keep the container level, and watch the first feeding. If birds cannot reach comfortably, they will shove, twist, or spill feed. Clean any damp crumble and use the symptom-first checks in Quail Wasting Feed: 7 Fixes for Cleaner Feeders (2026).
Are homemade quail feeders worth it?
They can be worth it if you already have a suitable bucket or tub and can make smooth, well-spaced openings. A port kit saves construction time. Homemade feeders still need a secure mount, a lid, easy cleaning, and an access check for every bird.
Can I use a no-waste feeder for chicks?
Do not assume an adult feeder suits chicks. Chicks need 1/4-inch floor wire, and their smaller bodies change the access question. Use a chick-appropriate feeder, check that every chick reaches feed freely, and reassess the setup as they grow.