 Quail Corner
Best Overall
Hatching Time Quail Breeding Cage Indoor, 2 Section, 1 Layer, Traditional
$$
Check Price on AmazonSet up an indoor quail cage in a dry, draft-free, ventilated spot. Then check the floor, gaps, trays, feed, and water before Coturnix move in. The key test is usable standing floor, not the cage’s outside dimensions or a seller’s capacity claim.
Measure the room and plan access around the cage first. If you are still choosing housing, our indoor quail cage picks give you a starting point for comparing ready-made layouts.
A four-part setup check for ready-made Coturnix housing
A stable, cleanable indoor Coturnix setup with verified floor space.
Call it ready when the cage is stable, each bird floor has enough usable area, gaps and edges are safe, trays come out, water flows, and every section can be cleaned. Allow at least 1 ft² of wire-cage floor per Coturnix, with 1.5 ft² as the kinder target. Count stacked levels separately.
For a ready-made example, I’d start with the Hatching Time two-section Traditional model. It has a removable middle wall, a listed 23.8 x 17.3 in floor area, polypropylene parts, a sloped floor, roll-out collection area, removable waste tray, and a 1-gallon tank with two drinker cups and water-line parts. Its assembled size is 23.8 in L x 24 in W x 18.1 in H. That height is above the 8–12 in reference, so inspect the bird compartment and plan soft roof protection. These are listing details, not a stocking recommendation, and the unit is for indoor or enclosed-shelter use rather than predator-proof outdoor housing.
$$
Check Price on AmazonMeasure the footprint and leave room to open doors, pull the waste tray, reach feed and water, collect eggs, and clean. Keep the cage dry and ventilated, away from direct airflow and heavy household traffic. Penn State Extension’s Small Scale Poultry Housing covers practical housing layout and ventilation.
Measure the usable bird floor first. Allow at least 1 ft² per Coturnix on wire cage flooring, with 1.5 ft² as the kinder target. Calculate each section or level on its own. Use ½ in x ½ in as the adult floor-wire reference and ¼ in for chicks. Measure generic panels, feel for sharp edges, and confirm the floor is supported.
Use 8–12 in as the cage-height reference. A taller compartment needs a soft roof or another plan to reduce upward head impacts. Extra height never makes up for too little floor area.
Follow the supplied assembly instructions. Fit the floor, frame or supports, dividers, doors, and fasteners in the order the maker specifies. Check that the cage does not rock and that clips, screws, and edges are secure. For an addition-only unit or generic panel pen, verify the compatible frame and roof before assembly.
Slide the collection and waste trays in and out before birds arrive. Support the roll-out floor, seat the tray squarely, and check that eggs have a clear path to the collection area. Use about 7–10° as the practical roll-out slope reference, then dry-test the assembled floor instead of assuming it works.
Secure feed and water parts where birds can reach them without fouling, tipping, or pulling them loose. Fill and test every cup, nipple, hose, tank, and connection with clean water. The Hatching Time example uses a 1-gallon tank, two drinker cups, and water-line components. Other cages need different parts. For another option, see our quail waterer guide.
Check the Hatching Time cage on Amazon
Open every door, remove every tray, inspect every edge and gap, and clean the bird areas. Confirm ventilation is open, footing is secure, and you can reach the interior without chasing birds. Fix a binding tray, leaking connection, flexing floor, or escape-prone gap before stocking.
Measure usable length x usable width for each bird floor, convert to square feet if needed, and divide by at least 1 ft² per Coturnix. Use 1.5 ft² as the kinder target. Keep stacked levels separate, and ignore any “up to” seller claim when setting your limit. For wider buying context, see the broader quail cage comparison.
Remove the tray, inspect supports and debris, level the cage, and refit it without forcing the runners.
Check floor orientation, tray alignment, and obstructions. Use about 7–10° as the roll-out reference, not proof that the product is assembled correctly.
Check tank level, hose seating, line kinks, and cup or nipple fit. Test again before introducing birds.
Stop assembly, return to the supplied instructions, and secure the frame or support. Do not stock an unstable enclosure.
Measure the opening, cover or replace the unsafe component, and contact the seller if the delivered part differs from the listing.
Move it away from direct airflow and traffic while preserving ventilation and access for waste removal and water checks. For a health concern, talk to a veterinarian or extension office.
Confirm usable floor area, gap size, roof safety, tray fit, door access, floor support, feed and water placement, ventilation, and the return policy. Penn State Extension’s Poultry Facilities and Technology material gives useful background on maintenance and facility planning.
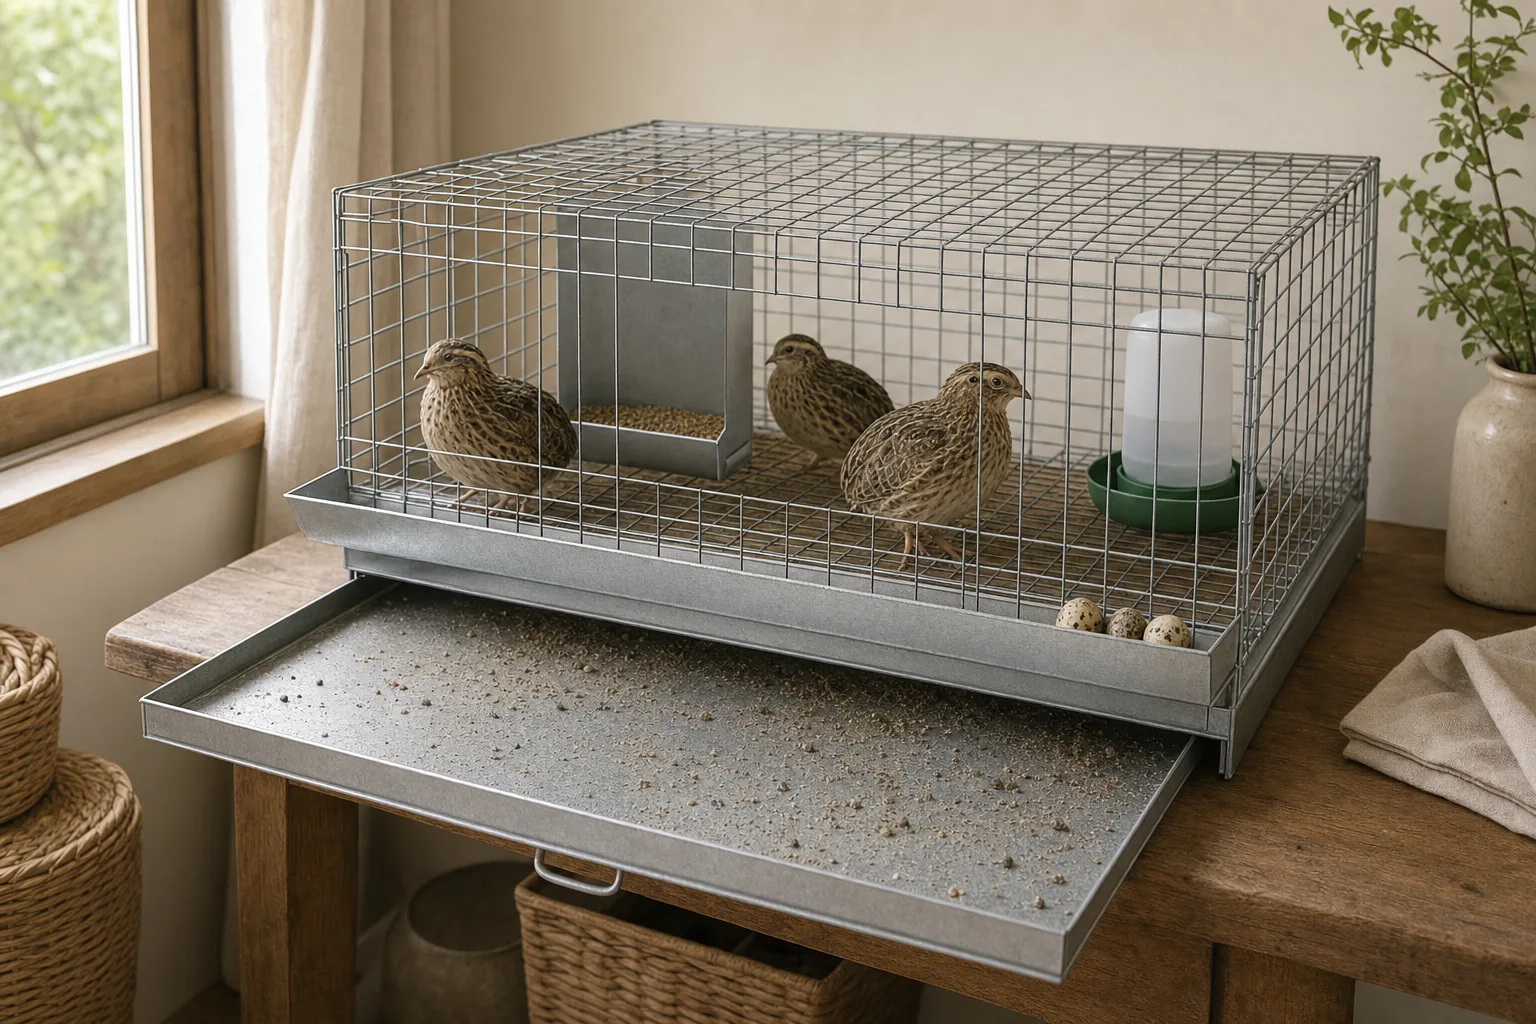
The Hatching Time two-section Traditional model is the contextual pick here because its removable divider, sloped roll-out collection area, waste tray, and organized watering simplify setup. A generic hutch can suit a different layout after you verify its floor, gaps, roof, tray, and ventilation.
Yes, if it provides enough usable floor, suitable geometry, ventilation, and cleaning access. Purpose-built cages make those checks easier. An indoor or small-animal label alone does not prove that a repurposed cage fits Coturnix.
Start with at least 1 ft² of wire-cage floor per Coturnix, with 1.5 ft² as the kinder target. Measure each usable section or level separately. The result comes from bird standing space, not a seller headline or the cage’s total vertical footprint.
Use 8–12 in as the Coturnix cage-height reference. A taller bird compartment needs a soft roof or another head-impact mitigation plan for upward flushing. Extra height does not replace the floor area each bird needs.
They can when the cage and room are dry, draft-free, ventilated, reachable for cleaning, and large enough by usable floor area. Every room and generic hutch has different limits, so check access and bird space before bringing quail inside.
Check usable floor area, gap size, roof safety, tray fit, door access, floor support, feed and water placement, ventilation, and the return policy. The word quail in a product title is a starting clue, not proof that the delivered cage is suitable.