 Quail Corner

How to Set Up an Incubator for Button Quail Eggs: 7 Steps
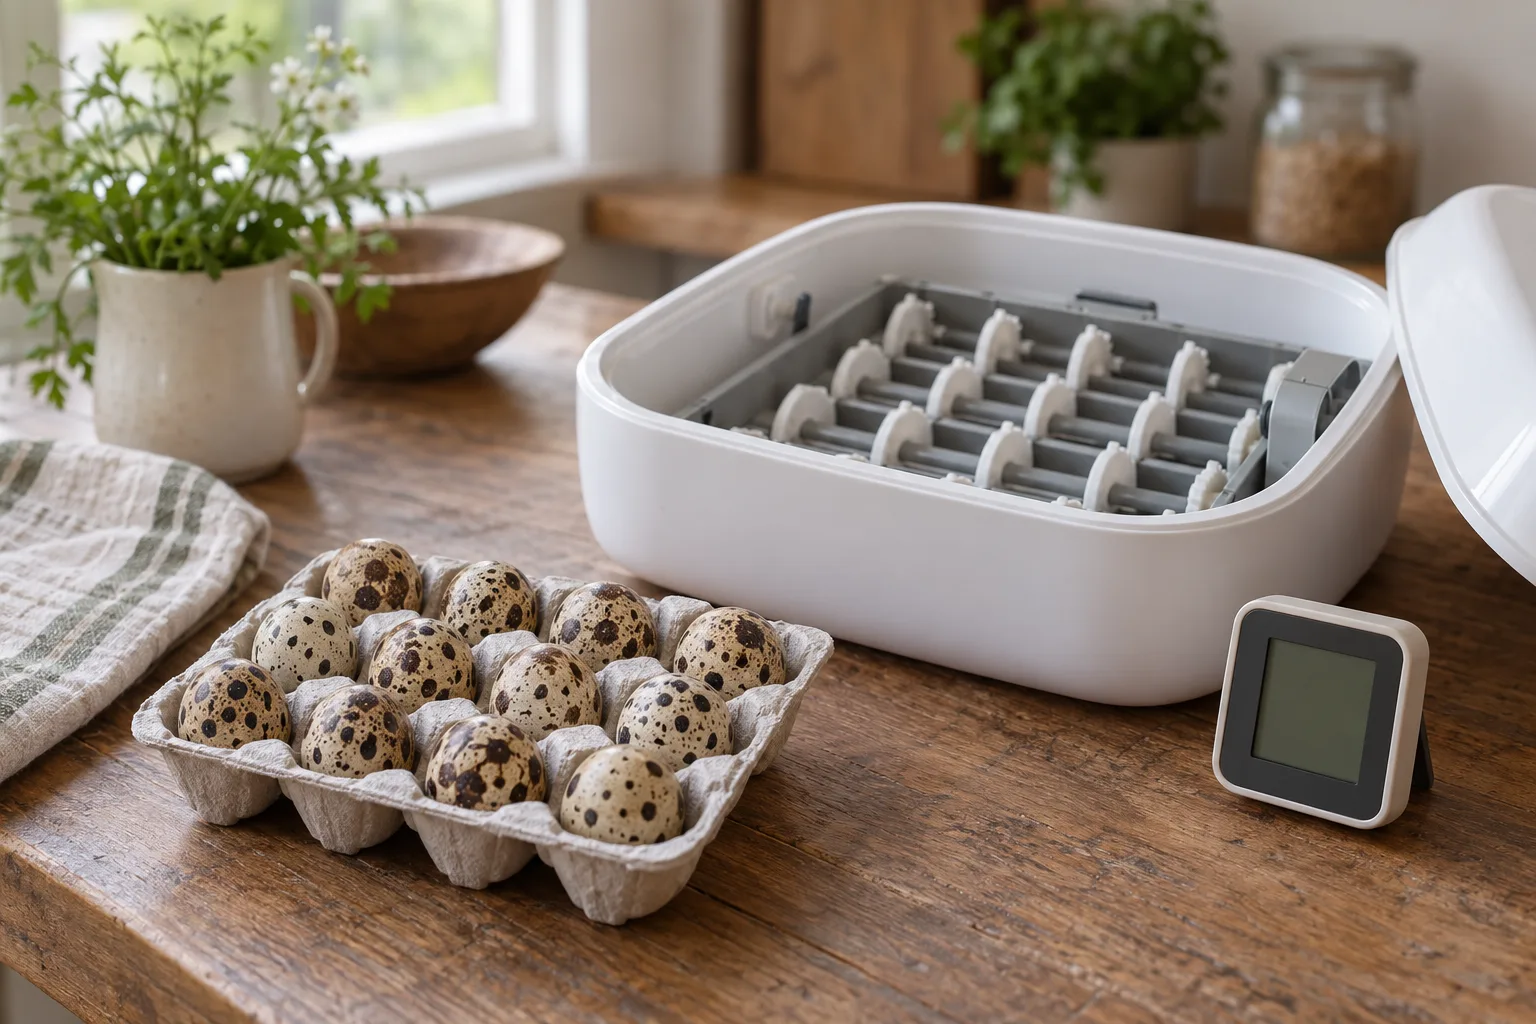
The first job is tray fit. Button-quail eggs are tiny, so a chicken or coturnix tray can leave them loose, poorly turned, or trapped in the wrong spaces. This guide takes you from an empty incubator to a ready brooder without borrowing coturnix timing.
Set Up a Button-Quail Incubator
A repeatable 7-step process for a small batch
Step 1 Gather and fit
- Choose a small-egg tray
- Set up an independent meter
Step 2 Stabilize
- Run the incubator empty
- Confirm 99.5°F in forced air
Step 3 Load and monitor
- Add clean hatching eggs
- Prepare for day 16 and lockdown
Result
A fitted, checked incubator ready for button-quail eggs and a safe brooder handoff.
Quick answer
Install a dedicated small-egg tray, run a forced-air incubator until its reading settles, and verify 99.5°F (37.5°C) with an independent calibrated thermometer. Load the eggs, check that turning works, use button-quail guidance for humidity and lockdown, and plan around day 16, with a normal hatch range of 15–17 days.
For a buying comparison covering dedicated quail trays, automatic turning, humidity features, and small-batch capacity, see best button quail incubator (2026): 6 picks. Coturnix eggs follow a different incubation length, so use Quail Egg Incubator Settings: Day-by-Day Schedule for Coturnix only as a separate reference.
What you'll need
- A secure small-egg tray: The tray must hold button eggs snugly and let the turning mechanism move them without tipping them out.
- Independent meters: Use a calibrated thermometer and hygrometer at egg height. The incubator display is useful, but it is one measurement point.
- A brooder: Have ¼-inch floor wire or a solid floor ready, plus a shallow water dish with marbles or pebbles.
- A candler: A built-in light is convenient. If yours is weak or missing, Best Egg Candler for Quail Eggs (2026): 7 Picks covers separate options.
I'd point a small-batch keeper to the CluckRun 30-Quail Incubator because its listing specifies a dedicated 30-slot quail tray, automatic turning, a built-in LED candler, and a display for incubation data. Check the CluckRun listing Confirm the tray and turner on any incubator you already own before buying another machine.
Our Top Picks
Step-by-step
Step 1: Confirm the tray before plugging in
Place a few button-quail eggs, or eggs of the same size, in the tray and inspect the fit. Each egg should sit securely, with enough room for the turner to move it. A broad chicken tray is a poor fit if eggs slide, lie flat, or fall through.
Check the tray's direction of travel too. Some systems rock eggs; others roll them. The movement should be gentle and complete. If you use a CluckRun unit, its listing gives selectable 60-, 120-, or 180-minute turn intervals. The same listing says its auto-stop is four days before hatch. For a 16-day button-quail hatch, compare that setting with your chosen day 13–14 lockdown plan and the machine manual.
Step 2: Clean the parts and set up the room
Wash your hands, clean the removable parts as the manual allows, and place the machine on a level surface away from drafts and direct sun. Put the independent meters at egg height, where they show the conditions the eggs actually experience.
Step 3: Run the forced-air incubator empty
Turn on the fan and heater before loading eggs. Wait for the temperature to settle, then check the independent thermometer against the display. For forced air, the button-quail target is 99.5°F (37.5°C). Do not apply the 101–102°F still-air figure from a coturnix chart to a forced-air machine.
A still-air incubator has no fan, so temperature varies by height. This guide does not assign a button-specific still-air temperature. Follow that machine's manual and verify the reading at the maker's stated measurement point.
Step 4: Add the eggs and verify the turner
Load the eggs with the tray's small end and turning instructions in mind. Mark each shell lightly with a pencil if you will turn by hand. Watch one full automatic cycle before walking away, and make sure no egg rubs the wall or jams against a divider.
If you are deciding if automation earns its place, read Quail Egg Incubator with Automatic Turner: Is It Worth It? It explains the cost and tray constraints. Hand turning is workable when you can follow a set schedule.
Step 5: Record readings and use button-quail timing
Write down the temperature, humidity reading, start date, and any adjustments. Button-quail incubation is 16 days, with a normal hatch range of 15–17 days. Do not copy the 17–18-day coturnix schedule or its humidity targets.
ButtonQuailEggs.com's “Care Guide - Incubation & hatching” recommends 45–50% humidity through days 1–14 and 60–70% at lockdown. Phil's Best Button Quail, “Incubating Tips,” uses about 55% during turning and 65–75% for the hatch. Phil says to hand-turn at least 3 times daily, while ButtonQuailEggs.com says 3–5 times; both sources support steady turning and a wetter final stage.
Those keeper sources differ by one day on lockdown. ButtonQuailEggs.com says day 14; Phil's instruction to stop three days before a day-16 hatch points to day 13. Choose one schedule before setting eggs, then follow the incubator manual. Quail Life Farm's hatching guide adds practical handling advice.
Step 6: Candle briefly and prepare lockdown
Candle in a dark room with a quick pass, holding the egg gently and returning it promptly. Button eggs are small and speckled, so use the built-in LED if it shows enough through the shell, or use a separate candler.
On your chosen day 13 or 14, stop turning and raise humidity according to the keeper schedule you selected. Avoid repeated lid opening. Incubator Warehouse's “Quail Egg Incubation Temperature Chart” is a vendor reference that lists day 13 for button quail; Penn State, Mississippi State, and Texas A&M extension guidance help with general incubation principles, but coturnix timing stays labeled as coturnix.
Step 7: Move chicks to a safe brooder
Set the brooder before hatch day. Give chicks 95°F at chick level during week one, then lower it 5°F per week. Use ¼-inch floor wire or a solid floor so tiny feet cannot slip through, and put marbles or pebbles in water dishes to reduce drowning risk.
For a small indoor brooder, I prefer a brooder plate because chicks can step under it like a hen and the room stays darker. A heat lamp can work, too, if it is mounted securely and kept away from bedding. Measure 95°F at chick level either way. Leave newly hatched chicks in the incubator until they are dry and steady, then move them calmly. If a chick cannot stand, eat, or drink, talk to a vet or extension office.
Common mistakes
- Using the chicken tray: Tiny eggs slide or sit in the wrong position. Test the quail insert and its movement before loading.
- Trusting one display: A screen can look steady while the egg-level reading differs. Add an independent thermometer and hygrometer.
- Copying coturnix lockdown: Button quail hatch in 16 days, so use button-specific keeper guidance around day 13–14 instead of a coturnix day count.
- Preparing the brooder late: A wire gap that is safe for adult quail can catch a button chick. Fit ¼-inch flooring before the first pip.
Troubleshooting
The eggs do not move in the tray
Pause the turner and inspect the egg position, divider, and plug. A tray designed for larger eggs can bind button eggs or leave them loose. Refit the dedicated insert, then watch a complete cycle before restarting.
The display and independent meter disagree
Check that both meters sit at egg height and away from the heater, fan outlet, or water channel. Give the empty machine time to settle, then follow the manual's measurement point. Change one thing at a time so you know what fixed the reading.
The brooder floor feels unsafe for chicks
Move the chicks onto ¼-inch wire or a solid floor and make the water dish shallow. Add marbles or pebbles so a chick cannot fall into open water. Set 95°F at chick level and watch where the chicks stand. Crowding under heat or avoiding it both call for a check of the setup.
Frequently asked questions
How long do button-quail eggs take to hatch?
Plan for 16 days. The normal hatch range is 15–17 days, so keep the incubator running and avoid rushing a quiet egg at the first expected date.
What temperature should a button-quail incubator use?
Use 99.5°F (37.5°C) in a forced-air incubator. Check the reading with an independent calibrated thermometer at egg height before loading eggs.
Do button-quail eggs need a special tray?
They need a tray that holds tiny eggs securely and turns them without letting them roll or jam. Confirm the insert and the turning action before buying or loading an incubator.
What should I prepare for button-quail chicks?
Prepare a brooder with ¼-inch floor wire or a solid floor. Set 95°F at chick level for week one, then drop the temperature 5°F per week, and use marbles or pebbles in water dishes to reduce drowning risk.