 Quail Corner
Button Quail Hitting Head on Cage: 6 Safe Fixes (2026)
If your button quail is hitting its head on the cage, move it away from the exposed hard roof first. Then fit a securely attached, breathable low or soft inner roof and check escape gaps, corners, and startling visual triggers before the bird returns.
Stop button quail boinking safely
A calm inspection and roof-protection sequence
- Move the bird from the hard impact point
- Use a secure temporary space
- Find the roof, wall, and gap hazards
- Look for visual startle triggers
- Fit a soft or flexible inner barrier
- Keep it snug and breathable
- Add a stable floor-level hide
- Keep useful floor space open
- Test openings, latches, airflow, and access
- Make sure cleaning remains practical
- Watch for repeat impacts
- Adjust startle triggers and layout
A calmer enclosure with no exposed hard launch target
Quick answer
Stop the current hazard, use a low or soft roof treatment that is securely attached and breathable, then inspect openings, sudden shadows, handling, traffic, and enclosure placement. The safest redesign starts with a floor-first enclosure, so compare our button quail cage picks with the lid and gaps in mind. If impacts continue or the bird looks hurt, stop the hazard and talk to an avian vet or your extension office.
What you'll need
The permanent fix for a persistent boinker is usually height, not padding: a low floor-panel playpen removes the launch distance entirely, and a single-section quail cage keeps the roof close enough that a startled bird cannot build speed. Gather the inspection and safety items before opening the cage. Loose cloth, exposed strings, sagging netting, and improvised materials that can entangle a bird are unacceptable, even if they feel soft.
- A calm, escape-proof temporary holding space
- A tape measure for checking the enclosure and impact point
- A breathable flexible or soft roof barrier appropriate for animal housing
- Secure fasteners or clips that cannot become accessible chew or snag points
- A properly fitted solid floor covering or verified button-safe floor material
- A low hide or visual shelter that leaves ventilation and cleaning access clear
- A flashlight for checking corners, doors, and panel joins
How can you stop button quail hitting the cage roof?
Start by removing the bird from the impact point, then inspect the enclosure before changing its furnishings. Protect the roof, make the floor-level area feel secure, verify every opening and the floor, and return the bird only after airflow, access, and cleaning still work.
Step 1: Stop the immediate impact
Move the bird calmly to a secure temporary space away from the exposed roof. Avoid chasing or loud handling, and do not return it to an unchanged hazard. This pause gives you room to inspect the cage without prompting another upward flush.
Step 2: Find the launch and impact points
Inspect the roof, corners, doors, panel joins, and any route that looks like an escape. Look for sudden movement, bright reflections, shadows, room traffic, curtains, or a hand approaching from above. “Boinking” is a keeper term for the upward jump response. It does not identify an illness.
Step 3: Fit a soft or flexible inner roof
Fit a snug, breathable barrier below the hard roof and attach it so the bird cannot reach loose edges or fasteners. Birds.com’s button quail article mentions fine flexible netting because it has some give. Treat that as a starting idea only. Check the mesh opening, strength, airflow, and snag risk against your enclosure before you fit anything.
Remove anything with loose loops, frayed edges, sagging sections, or exposed threads. A soft material becomes a new hazard if it can snag a toe or wrap around a bird. Keep the barrier easy to inspect and replace.
Step 4: Make the floor-level area feel secure
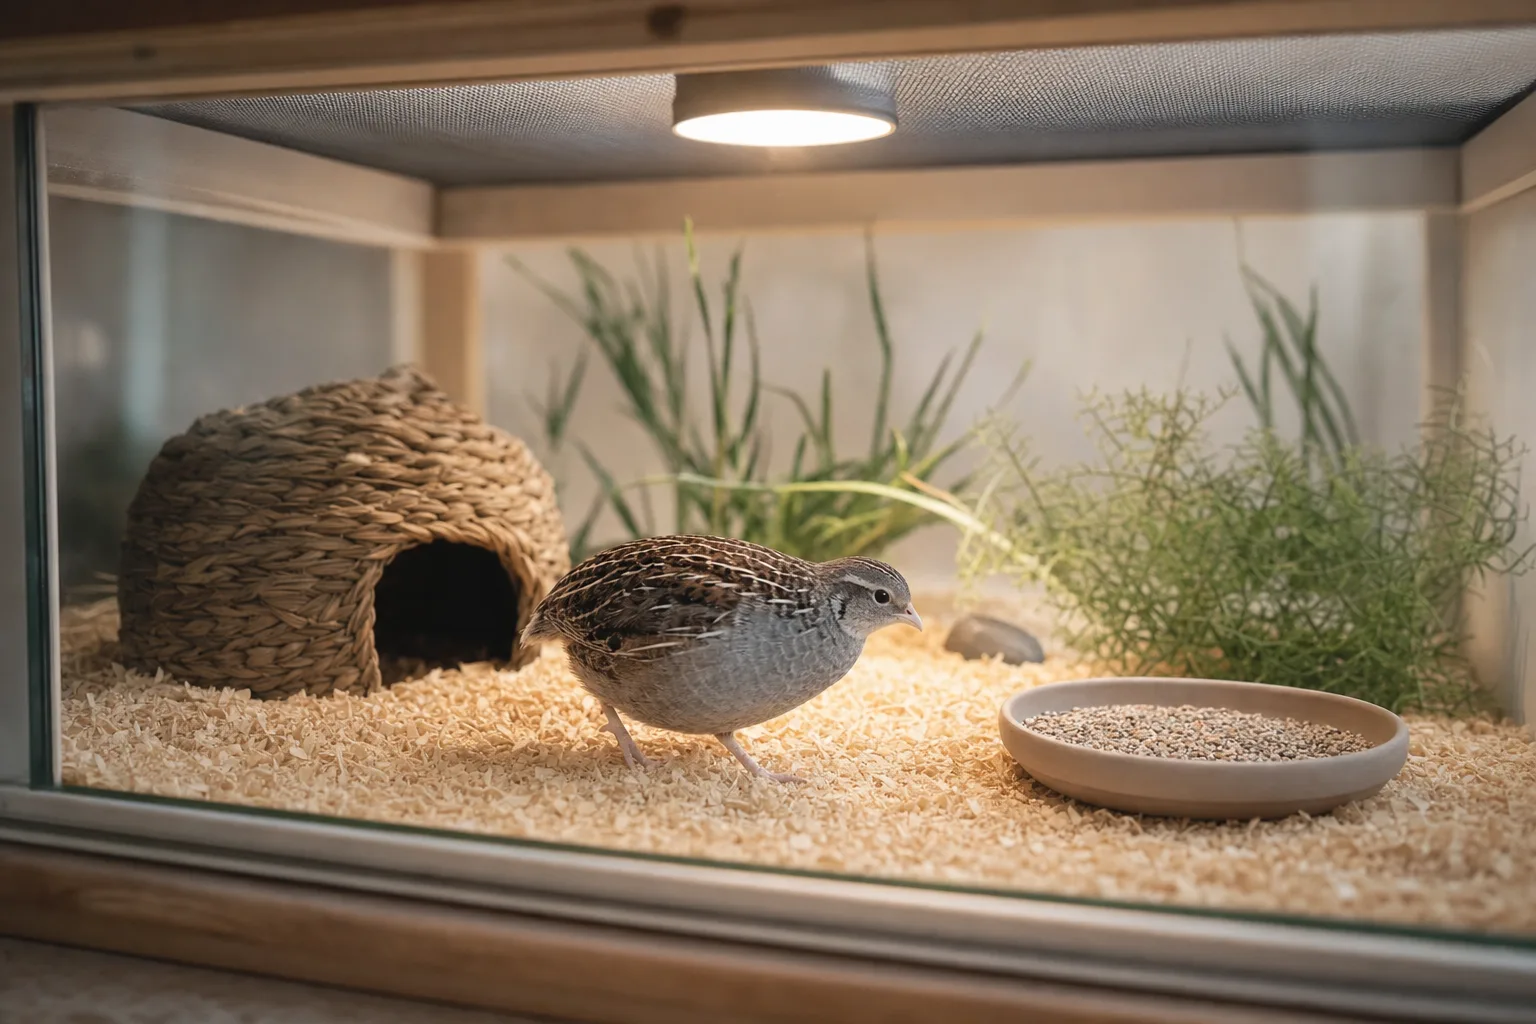
Keep the setup ground-oriented. Add a stable low hide or visual break, remove needless perches and clutter, and preserve usable floor space. Florida Button Quail’s housing guide and Petco’s care sheet both frame button quail as floor-oriented birds. Simply buying a taller cage does not solve an exposed hard launch target.
Step 5: Check every opening and the floor
Measure the real gaps at doors, joins, walls, and the floor. Small button quail and chicks can escape through openings that look acceptable on a generic bird or small-animal cage. For button-quail chicks, use ¼-inch floor wire or a solid floor. Treat that as a chick-floor standard, not a universal wall-panel rule for every adult enclosure.
Step 6: Return the bird only after a calm safety check
Confirm the roof barrier is secure, airflow remains open, doors are latched, and the floor is stable. Check that you can spot-clean daily without a full teardown. Return the bird calmly, then observe for repeat impacts and adjust environmental triggers. This makes the setup safer without promising every jump will stop.
What cage mistakes make boinking worse?
Boinking gets worse when a cage has a hard roof, a loose cover, or poor airflow. Judge the whole setup by its protected top, usable floor, openings, and cleaning access rather than by height or a marketing label.
- Buying by total height alone. A tall cage is not automatically safer for a bird that launches upward. Judge the protected top and usable floor together.
- Leaving a hard roof exposed. Escape control does not make a solid roof a safe impact surface.
- Using loose padding or netting. Sagging, frayed, or looped material can snag or entangle a bird.
- Blocking ventilation. Coverings should remain breathable. Heavy padding can make the enclosure stuffy.
- Trusting the label. “Bird cage,” “small animal,” and “quail” labels do not replace checking the actual gaps, floor, top, and access points.
- Adding perches instead of floor security. Button quail are ground-oriented. Keep the practical floor open and uncluttered.
- Ignoring daily cleaning access. Indoor housing needs daily spot-cleaning, so choose a roof and floor arrangement that lets you reach dirty areas.
What should you check if the problem continues?
If boinking continues, the barrier, layout, or trigger still needs attention. Recheck the roof and corners first, then look at reflections, shadows, traffic, handling, openings, airflow, and cleaning access. Make one safe change at a time so you can see what helps.
The bird still hits the roof after I add a barrier
Recheck whether the barrier is hard, loose, too high, reflective, or leaving a reachable corner. Look for moving shadows, sudden handling, room traffic, or another startle trigger. Do not lower the roof to a made-up number and assume the problem is solved.
The bird targets one corner or door
Inspect that point for a gap, bright reflection, daylight, moving curtain, or latch that looks like an exit. Add a secure visual break while preserving ventilation and cleaning access. Open and latch the door again after the change.
The bird is trying to escape through the panels
Stop the access route and measure the actual opening. Do not assume a generic small-animal panel is button-quail-safe. Check every join and door, since one overlooked corner can become the preferred escape point.
The roof covering is sagging or fraying
Remove it and replace it with a properly fitted, securely attached barrier. Never leave loose strands, loops, or reachable fasteners in the enclosure. A barrier that cannot stay fitted and breathable is the wrong barrier for that setup.
The enclosure feels stale or is difficult to clean
Reduce coverings and clutter, restore airflow, and change the floor or roof setup until daily spot-cleaning is practical. Do not expose the hard roof again to fix ventilation. Change the design instead.
There have been repeated impacts or the bird appears injured
Stop the hazard and move the bird to a calm, secure space. Talk to an avian vet or extension office for guidance. Do not try to diagnose the bird or give it medication yourself.
Where can you learn more about quail housing?
Once the roof and openings are safe, review more quail housing guides for floor-first layouts, cleaning routines, and enclosure choices. Keep the same checks in place whenever you move the bird to a new cage or aviary.
Frequently asked questions
What does button quail boinking mean?
Button quail boinking is a keeper term for a startled upward jump that can meet a hard cage roof. It describes behavior and impact risk, not a diagnosis. Remove the exposed target, check the enclosure for triggers, and talk to an avian vet or extension office if impacts continue or the bird looks hurt.
How high should a button quail cage be?
The facts sheet does not provide a universal button-quail cage-height number. Prioritize usable floor space, a low or soft roof, safe openings, ventilation, and the actual impact risk in your enclosure. If you choose a taller shape, protect the top on purpose.
Why is my button quail hitting the roof?
A startled bird can jump straight upward toward a hard roof. Bright reflections, sudden shadows, handling, traffic, exposed corners, an escape-looking gap, or an unsuitable cage shape can add to the response. Inspect those points and protect the roof before returning the bird.
Can a soft roof stop button quail boinking?
A correctly fitted soft or flexible roof can reduce the danger of a hard impact. It must stay breathable, secure, and free of loose loops, frayed edges, and reachable fasteners. It does not remove the need to check the enclosure, visual triggers, gaps, and floor safety.
Are tall bird cages safe for button quail?
Tall bird cages are not safe by default for button quail. The design needs a protected top, suitable floor-level living space, escape control, ventilation, and practical cleaning access. Button quail housing favors floor space over height, so total cage height alone is a poor buying test.
Should I use mesh or padding on a button quail cage?
A flexible barrier can provide some give, while padding can create its own loose-material risk. Check the mesh opening size, strength, attachment, ventilation, durability, and entanglement risk before use. Never leave loose mesh, fabric, strings, loops, or reachable fasteners where a bird can snag itself.