 Quail Corner
What Angle for Quail Egg Roll Out Cage: 2026 Guide
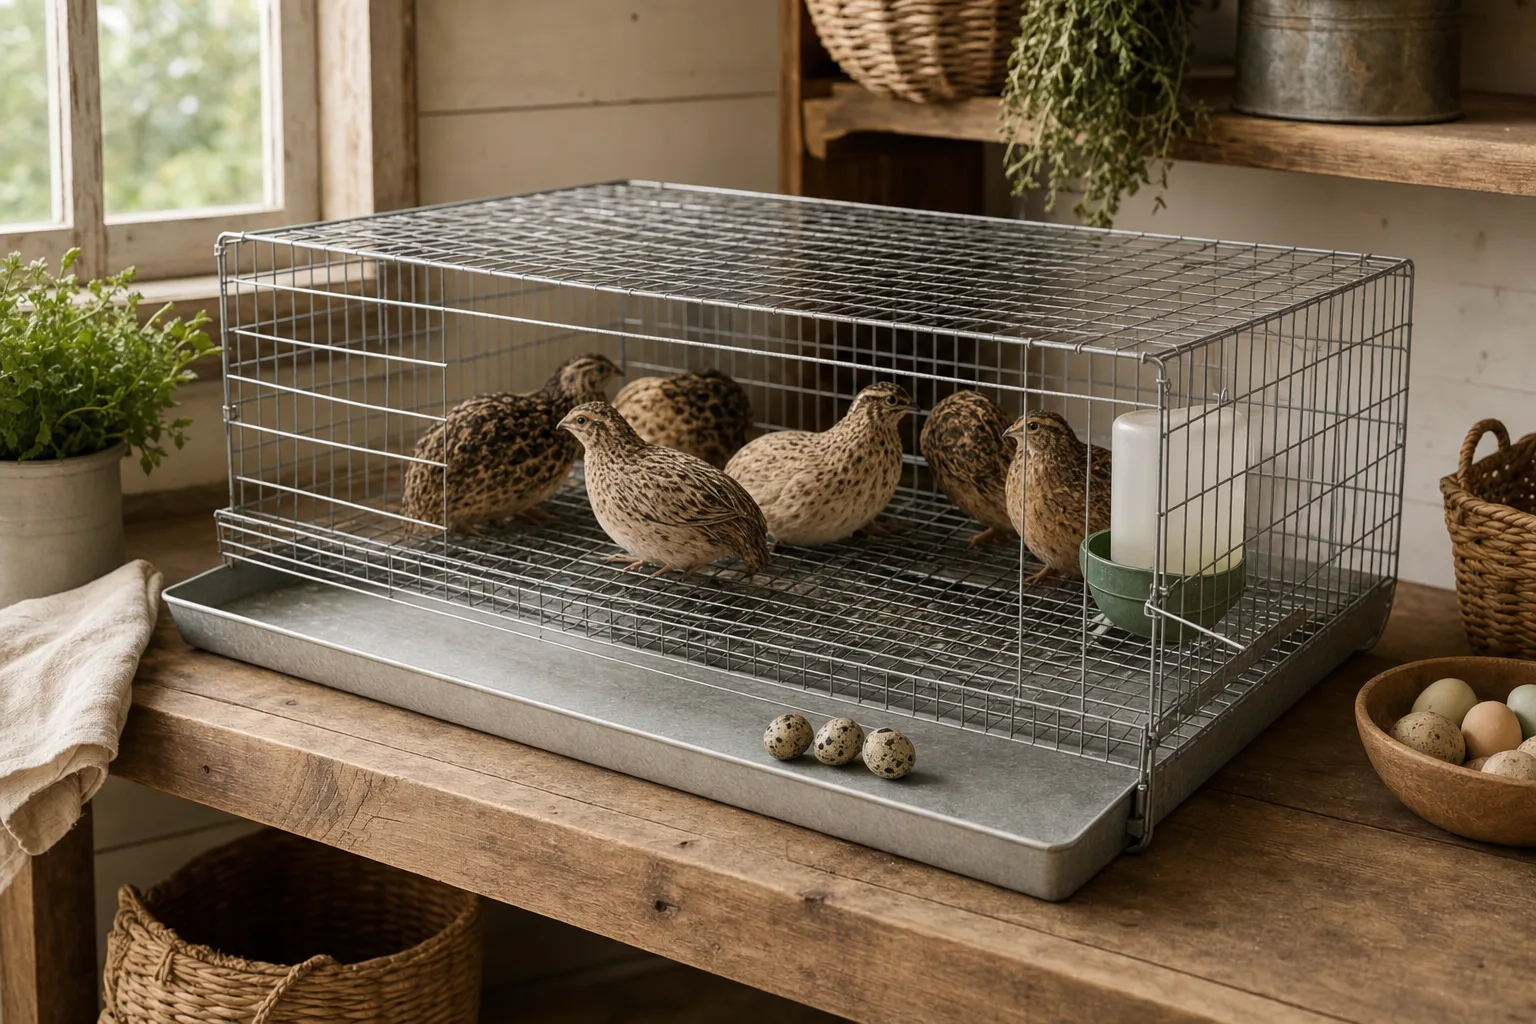
The right angle for a quail egg roll-out cage floor is roughly 7–10°. That slope lets eggs move toward an outside tray while the floor remains usable for the birds.
Use the slope as your first check. Then look at usable floor area, floor safety, tray alignment, ventilation, and the parts included in the listing. This guide focuses on ready-made cages and gives retrofit and DIY-style designs only a short mention.
Which roll-out cage type fits your setup?
For most backyard keepers, a purpose-built roll-out cage is the easiest starting point because its sloped floor and collection path were designed together. A retrofit suits an existing compatible frame, while wood and ground-pen designs suit a different housing pattern. Read our quail housing guides and our quail cage picks before you choose.
| Type | Best fit | Trade-off |
|---|---|---|
| Purpose-built roll-out cage | New setups that want outside egg collection | Costs more and gives you less freedom to change the layout |
| Flat-floor cage with a retrofit | Keepers who already own a compatible frame | Fit, floor angle, and tray alignment depend on the parts working together |
| Wood or ground-pen design | Covered or roomier housing plans | Egg collection follows a different path and takes more setup thought |
Purpose-built roll-out cages
These cages, such as a three-section two-layer roll-out cage, put the floor, front edge, and collection tray on the same egg path. A wooden two-tier cage with pull-out trays solves the same problem in timber if wire does not suit the space. They suit a new roll out quail cage setup where you want to collect eggs from outside the bird area. Check the usable footprint and the listing’s included water and waste parts before you pay.
Flat cages with a retrofit
A retrofit adds a sloped floor or catcher to a cage that started with a flat base. It can save money when you already have a compatible frame. You give up the certainty of a matched floor and tray, so do not mix components without clear maker instructions.
Wood and ground-pen designs
Wood or ground-pen housing suits keepers who value walking room, a covered indoor look, or a different flock arrangement. It gives up the tidy automatic path of a purpose-built floor. Ground housing also needs more floor area than a wire cage, so measure the space available before you commit.
Which checks matter most on a roll-out cage?
Check the floor slope, usable floor area, and egg route before admiring the frame. The right quail cage design moves eggs away from the birds without taking away safe footing, airflow, or room to move. Treat every product page as a parts and dimensions list.
Floor slope and safety
Look for a purpose-built floor with a roughly 7–10° slope and a clear path to the front. The bird area should have sound, even wire without a sharp edge or damaged section. Adult cages can use ½ in × ½ in (13 mm) hardware cloth; chicks need ¼ in.
A close-up of the tray proves very little. Find a diagram or manual that shows how the floor, front edge, and tray meet. A quail egg cage design should protect feet while guiding eggs, not make the birds stand on a rough or badly joined surface.
Floor area and cage height
Use the usable bird floor as your main sizing check. Give each bird 1 ft² (0.09 m²) minimum in a wire cage; 1.5 ft² is kinder. Vendor capacity is a listing claim, not a stocking recommendation. Divide the usable area by your flock size before you order.
For height, look for 8–12 in (20–30 cm). Taller cages need a soft roof because startled birds can hit their heads. Measure the space where birds actually stand, rather than counting the tray, frame, or an unused ledge.
Tray path, airflow, and surfaces
Follow the egg route from the bird area to the outside tray. The tray should be reachable without opening the main cage, and the waste route should be accessible for cleaning. Check for open airflow and washable surfaces too. Penn State Extension’s Small Scale Poultry Housing resource stresses dry housing, protection, and ventilation.
Standard and jumbo fit
For standard birds, compare the usable floor area with the section layout. For jumbo birds, buy only when the catalog specifically identifies jumbo flooring, then repeat the floor-area calculation. A shared brand name does not make every section suitable for every bird size.
Complete cage or layer addition
A layer addition is an expansion component, not automatically a complete, freestanding cage. Before ordering any modular cage or addition, check the listing for the frame, wheels, lid, water tank, hose, connector hardware, waste tray, and feeding or watering components. Hatching Time and Cimuka vendor listings can explain a configuration, but the selected listing controls what ships.
Feeder and water access
Food and water should be reachable without blocking the egg path or crowding the usable floor. Check the actual cups, tanks, hoses, and mounting points shown for that configuration. For the rest of the setup, see our quail feeder and waterer guides.
What do the three budget tiers buy?
Use $ for basic equipment, $$ for a compact complete system, and $$$ for larger modular or stacked systems. The symbols describe the kind of setup, not fixed dollar cutoffs. Compare the parts supplied and the usable floor area before you compare prices.
| Tier | What you get | Watch for |
|---|---|---|
| $ | Basic cage or retrofit-friendly equipment | The tray, frame, or water parts can be separate |
| $$ | Compact complete unit with a matched egg path | Less expansion room and a smaller usable footprint |
| $$$ | Larger modular, jumbo-floor, or stackable arrangements | An addition section that still needs a base system |
The $ tier makes sense for a keeper who already has a frame or wants to add a roll-out floor. The $$ tier is the sensible place to start for a small flock that needs a complete cage. The $$$ tier earns its keep only when you need expansion or a catalog-listed jumbo floor.
Which buying mistakes cause the most trouble?
Most roll-out problems start before the box arrives. A capacity headline can hide cramped floor area, and a low-priced addition can leave you without a frame. Check the diagram, included parts, and intended placement before ordering.
- Using vendor capacity as your target: Calculate 1 ft² (0.09 m²) per bird minimum, with 1.5 ft² kinder. The larger number gives your flock more room.
- Buying a layer addition alone: Confirm that the base frame and connection hardware are included or already owned. Check the listing for the lid, wheels, water parts, tray, and feeding components too.
- Setting the cage out of level: A tilted frame changes the intended egg path. Put the assembled cage on a level, stable, sheltered surface.
- Letting debris block the roll path: Bedding and droppings can stop eggs before they reach the tray. Choose a path you can see and access.
- Skipping the assembly instructions: Floor orientation and tray alignment follow the maker’s notes. Read them before assuming a part is missing or in the wrong place.
Which ready-made cages are the place to start?
Start with our quail cage picks for specific ready-made choices. The roundup separates compact two-section, multi-section and stacked, jumbo-floor, grow-out, layer addition, and wood alternative configurations so you can compare the job each one is meant to do.
A compact two-section setup suits a smaller flock. Multi-section and stacked layouts give you a route to expansion. A jumbo-floor configuration deserves a fresh floor-area check, while a grow-out cage serves a temporary stage. A layer addition expands a compatible base system; it does not replace one.
Read the selected listing as a parts list. Confirm the frame, wheels, lid, water tank, hose, connector hardware, waste tray, and feeding or watering parts before you compare the final cost. That one check prevents a cheap expansion piece from becoming an expensive incomplete cage.
How can you read a roll-out cage listing?
Start with the diagram and usable footprint, not the bird-count headline. Trace the floor from the bird area to the collection tray, then check how waste leaves the cage. Match that usable area to your flock using 1 ft² per bird minimum and 1.5 ft² as the kinder target.
Separate fixed parts from optional additions. A product image can show a finished stack while the item in your cart is one section or an expansion piece. Look for words such as addition, connector, base, and compatible system. Then confirm every component in the chosen listing.
Choose a dry, sheltered location with workable airflow. Penn State Extension’s Small Scale Poultry Housing resource explains why protection, dry conditions, and ventilation matter. Mississippi State University Extension Service’s poultry-management guidance also describes ventilation, feed, and water access in caged housing. Use those sources for context, then follow the vendor’s assembly notes for the cage itself.
For more decisions about cages, feeding, hatching, and daily care, browse all Quail Corner guides.
Frequently asked questions
What is a quail cage with an egg roll-out tray?
It is a cage with a sloped floor that guides eggs toward an external collection path or tray. The birds stay inside while you collect eggs from the front. A purpose-built unit joins the floor and tray in one design, while a flat cage needs a compatible retrofit.
How steep should a quail cage egg roll-out floor be?
Aim for roughly 7–10°. That gives eggs a clear path to the collection area while keeping the floor usable for the birds. On a ready-made unit, follow the manufacturer’s assembly instructions because the floor angle and tray position work as one design.
How many quail fit in a roll-out cage?
Give each bird at least 1 ft² (0.09 m²) of wire-cage floor area. 1.5 ft² per bird is kinder. Treat a vendor’s maximum as a catalog claim, then calculate usable floor space yourself and allow room for food, water, and normal movement.
Can a roll-out cage house jumbo quail?
Yes, when the usable floor area suits the birds and the catalog specifically identifies flooring for jumbo quail. A standard section label does not prove jumbo fit. Check the actual floor, the jumbo designation, and your space-per-bird calculation before ordering.
What are the key quail cage dimensions?
Start with the usable floor footprint because it determines space per bird. For height, look for 8–12 in (20–30 cm). Taller cages need a soft roof because startled birds can hit their heads. There is no universal footprint for every flock or cage configuration.
What is the safest quail cage design for egg collection?
Choose a purpose-built sloped floor, then check floor safety, ventilation, access, and usable space. Penn State Extension’s Small Scale Poultry Housing and Mississippi State Extension’s poultry-management guidance add useful housing context. A convenient tray cannot rescue a cramped or poorly ventilated cage.