 Quail Corner
Best Compact
Aivituvin Outdoor Bird Cage Large Wooden Bird Aviary with Perch for Parakeet,Macaw and Any Small Birds,Wire Netting Above the Tray,Prevent Escape
$$
Check Price on AmazonSet up a quail aviary in this order: plan usable ground space, prepare a dry shaded site, secure the enclosure, add low shelter, install feed and water, then inspect everything before birds enter. This gives your flock safe outdoor housing at ground level, instead of a tall cage with unused height.
A repeatable 6-step process for Coturnix housing
A dry, shaded, ground-level aviary ready for a careful Coturnix introduction
A finished Coturnix aviary is an enclosed outdoor ground-level run with at least 2 ft² of usable ground floor per bird or more, dry shelter, shade, weather protection, secure mesh, dependable latches, feed, and water. Measure the floor birds can actually use. Do not count vertical space.
A ready-made bird cage can suit a tiny setup, while a true ground aviary gives a larger covey room to move. Compare the difference in our quail aviary picks before ordering. Raised wire cages are a separate housing choice, covered in our quail cage picks.
Gather the enclosure and its cover first, then plan the inside around the birds' usable floor. You need a dry retreat, low hiding cover, reachable feed and water, and a way to inspect every seam, latch, roof edge, and point where the enclosure meets the ground.
$$
Check Price on AmazonFollow these actions in sequence. Planning the floor before assembly prevents a common mistake: buying a tall enclosure, then discovering that its usable ground area cannot support the intended Coturnix flock.
Choose Coturnix or button quail first, then write down the flock size and calculate the usable ground floor. For Coturnix, allow 2 ft² per bird or more. Measure the actual floor, excluding trays, solid obstacles, and corners birds cannot reach.
Pick a spot you can reach for cleaning and daily checks. Look for shade, drainage, rain exposure, and nearby predator pressure. Button quail need separate planning: floor space matters more than height, and their straight-up jumps call for a soft or low roof.
Prepare a level, serviceable placement area with a dry retreat and protection from rain and harsh sun. Keep the route to the enclosure clear enough that you can carry feed, collect eggs, and inspect the floor without awkward access.
104 Homestead describes the foraging and activity possible with outdoor ground keeping. Silver Homestead shows why a covered pen matters. Use those ideas only on a site that stays dry and remains easy to service.
Assemble the frame by following the manufacturer's directions. Close every seam, fit the cover, and test each door and latch several times. Check that mesh reaches the ground as intended and that no sharp wire, open gap, or loose panel is waiting inside.
Describe the shell as predator-resistant only after you have inspected it yourself. A product label is no substitute for checking the finished assembly. Use this predator-proofing checklist for a second pass over doors, seams, and access points.
Create one open area for walking and scratching, then add low cover and a dry hiding area along an edge. Keep the retreat easy to clean and leave enough clear floor for the flock to move between food, water, shade, and shelter.
A tall bird cage or perch area does not replace Coturnix ground floor. This is where compact aviaries often disappoint: the outside height looks generous, but the birds still need their floor area measured from the usable base.
Install the feeder and waterer where every bird can reach them without crowding. Keep them away from the wettest corner and avoid placing them beneath a drip line. A damp, dirty patch quickly becomes the least useful part of the floor.
Check both supplies daily. Look for spilled feed, wet bedding or ground, fouled water, and blocked access. Move the equipment if the flock spends too much time avoiding one section of the aviary.
Inspect mesh, seams, latches, roof or cover, sharp points, ground contact, shade, and dry shelter. Confirm that feed and water are in place before you open the carrier. Fix any weak point first; a bird should never be your test for whether an enclosure is finished.
Move the flock only after the preflight check passes. Watch whether birds can reach the whole usable floor and retreat areas. Observe quietly at first, then repeat the checks after weather changes or any move of the enclosure.
The usual setup failures come from counting height as floor, trusting a product label without checking the assembly, and leaving weather protection until the end. Avoid them by measuring usable ground space first and treating the roof, shade, latches, and dry retreat as core housing parts.
Use the flock's movement and the condition of the floor as your clues. If birds avoid a zone, water turns dirty, or rain reaches the retreat, correct the enclosure or its layout before adding anything else.
Check whether the retreat is damp, exposed, cramped, or blocked by equipment. Move it into a dry shaded corner, clear the entrance, and make sure birds can reach it from the open floor.
Inspect the roof or cover, the ground contact, and the position of the dry retreat. Stop water entering from above, move supplies away from drips, and choose a more serviceable placement area if the site cannot stay dry.
Keep birds out while you close the seam or reset the panel. Test the latch and inspect the whole perimeter again. If the enclosure cannot provide secure mesh and reliable access points, choose a different housing plan.
For outdoor ground-pen trade-offs, shade, and foraging context, see 104 Homestead's “Raising Quail on the Ground | Outdoor Pens & Aviary Tips” and Silver Homestead's “Quail Ground Pen (natural outdoor keeping with Pics).”
The Backyard Chickens thread “Aviary for Quail - practical housing?” adds keeper experience about cover, dry conditions, and hiding areas. Treat it as lived experience, not a source for husbandry figures.
For more quail housing guides, compare the setup with your weather, cleaning routine, and flock plan before moving birds outdoors.
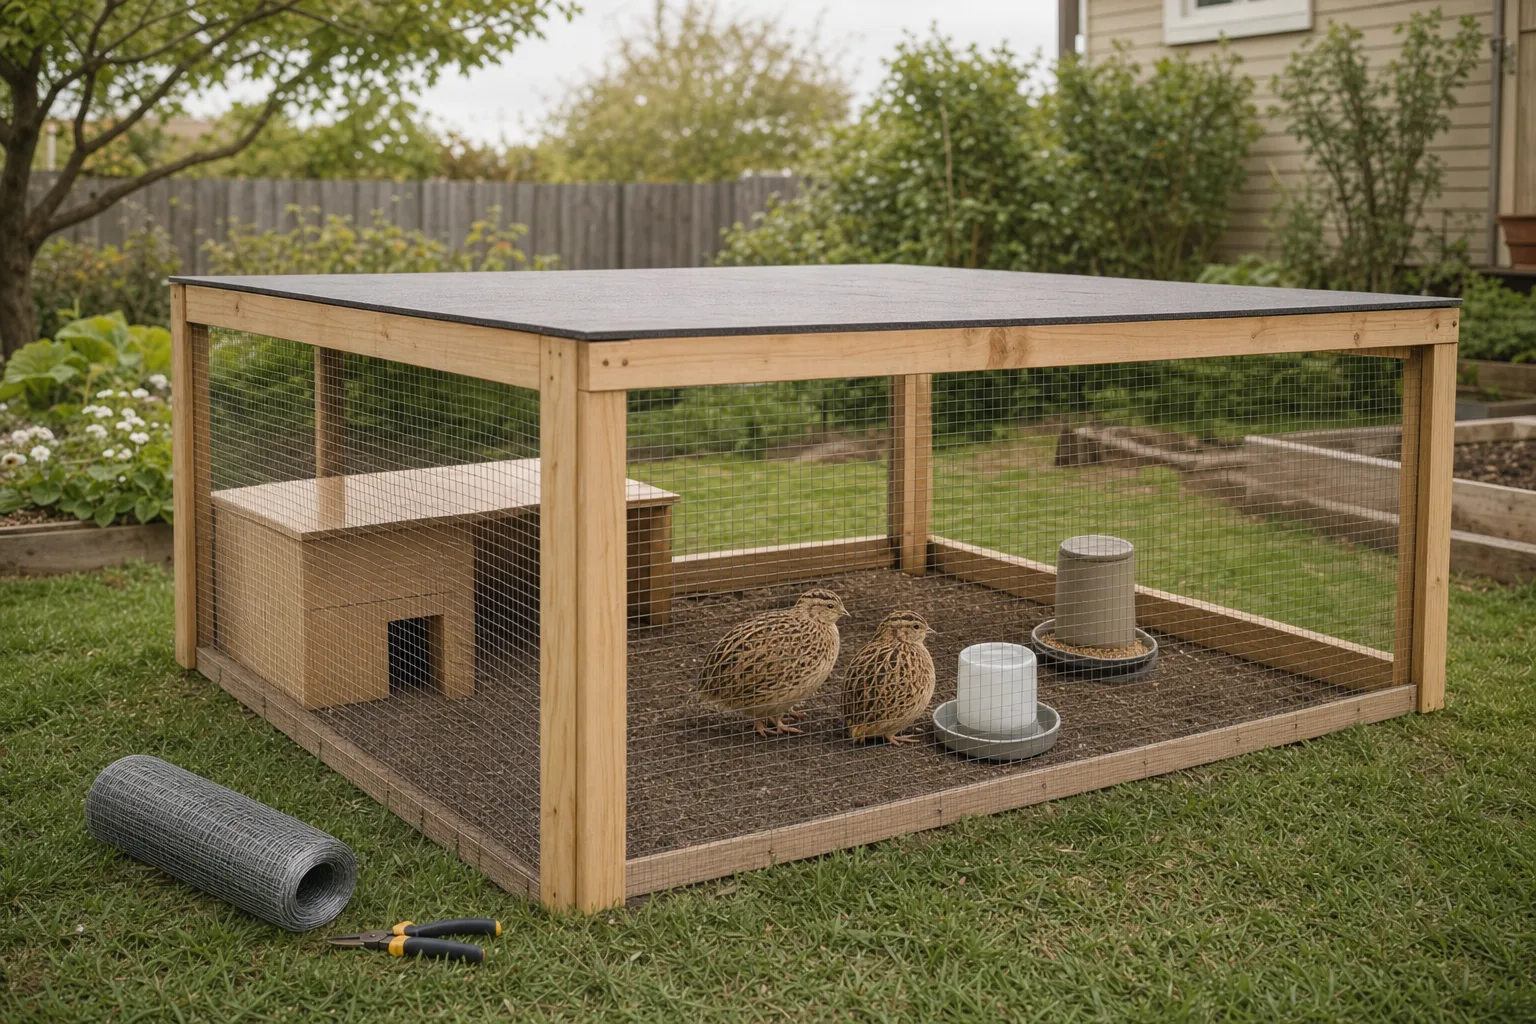
Coturnix need an enclosed, ground-level run with at least 2 ft² of usable ground floor per bird or more. Add dry shelter, shade, secure mesh, and reliable latches. The best arrangement still depends on your weather exposure and local predator pressure.
Yes, if the enclosure stays dry, draft-controlled, shaded, and secure. Give the flock enough usable ground space, plus food and water they can reach easily. Inspect the actual site and enclosure instead of assuming that any tall bird aviary will work.
Divide the usable ground floor area by 2 ft² per Coturnix bird, then treat that result as a minimum planning figure rather than an automatic stocking promise. Reduce the count when shelter, access, shade, or site conditions limit the floor birds can use.
A bird aviary can work when its mesh, gaps, doors, roof, floor, shelter, and ground contact suit quail. A compact tall enclosure can fit a very small setup, though vertical height does not replace the ground area Coturnix need.
Yes. Provide a weatherproof roof or cover and a dry retreat while keeping airflow and cleaning access. 104 Homestead and Silver Homestead both show why rain protection matters in ground pens, while the Backyard Chickens thread records keeper experience with cover and hiding areas.
Calculate usable floor, prepare a dry shaded site, secure mesh and doors, add low shelter, install feed and water, then inspect every access point before birds enter. Button quail are a separate fit: prioritize floor space and use a soft or low roof for their straight-up jumps.